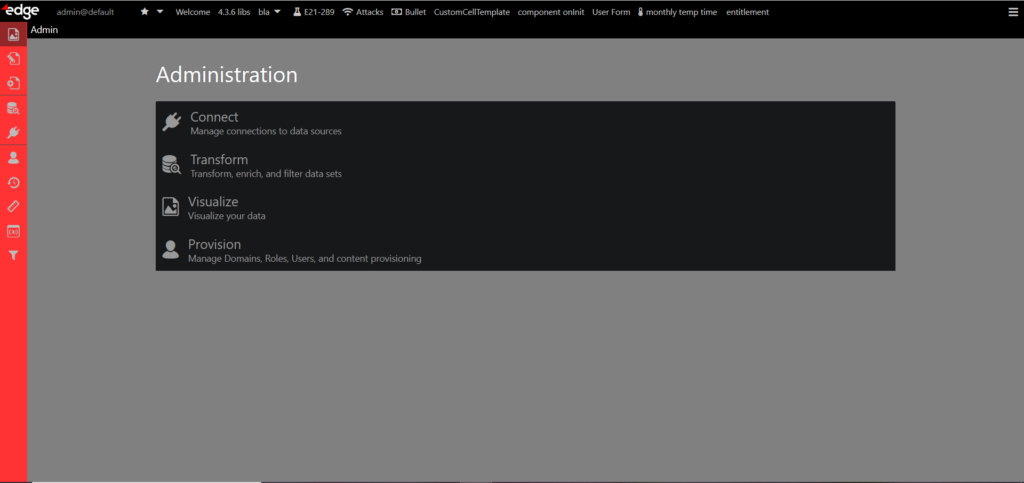
Overview
edgeCore ships with a light and dark theme (also known as Look and Feel). In addition, you can also create a custom theme.
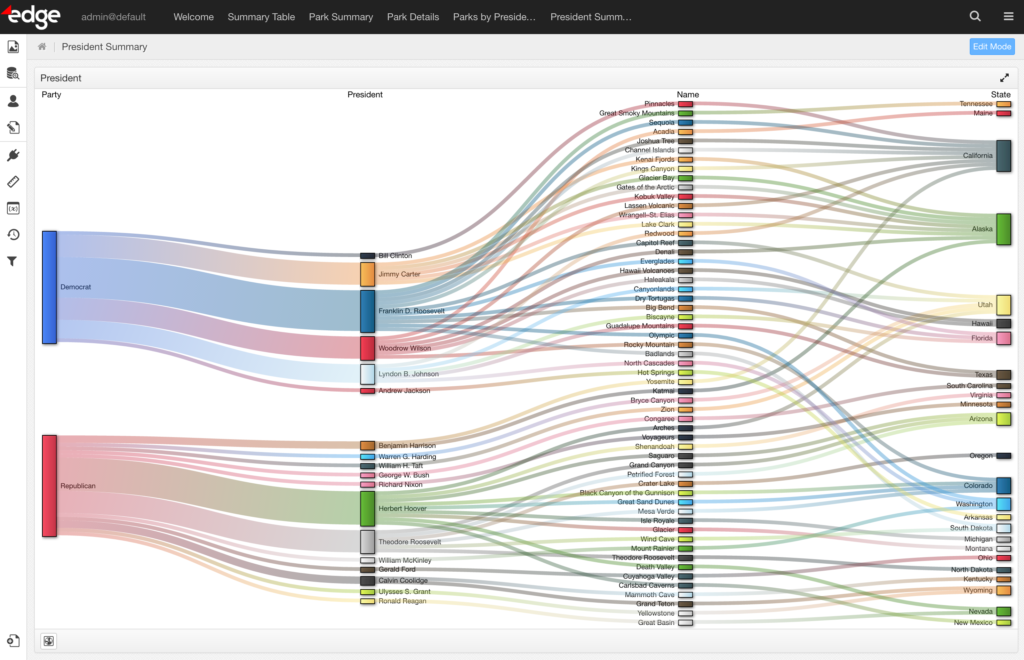
Light Theme Example
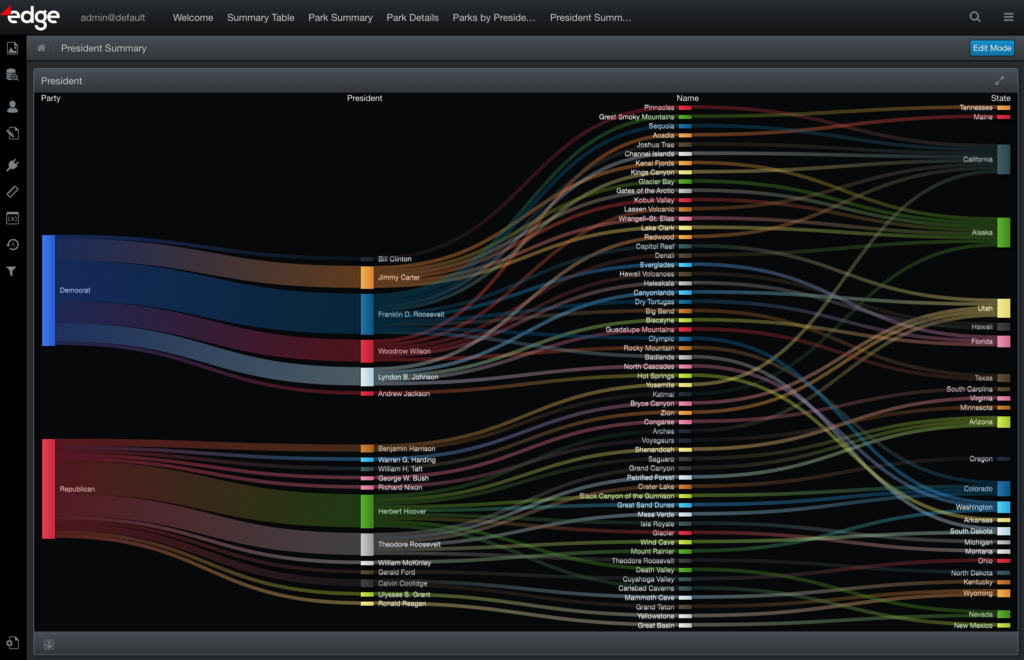
Dark Theme Example
Setting/Changing a Theme
Only administrators can set a theme.
Theme can be set on the server level and on the domain level. The domain level has precedence over the server level.
Setting/Changing a Theme on the Server Level
To set a theme for the server:
- Go to the Provision Defaults page as a Full Admin user.
You can access this page from either the Admin menu (the Provision icon > Defaults) or the System menu (Content > Provisioning > Defaults). - Click on the Preferences tab.
- In the Look and Feel section, select a name from the drop-down list (Edge Light or Edge Dark).
This section is explained in more detail below. - Click Save.
- On the Provision Domains page, select the default domain and ensure the Inherit toggle switch is enabled on the Preferences tab.
- Hard reload the page (Ctrl + Shift + R) for the theme to be applied.
Setting/Changing a Theme on the Domain Level
To set a theme for a specific domain:
- Go to the Provision Domains page as a Full Admin or a Domain Admin that is assigned to the domain in question.
You can access this page from either the Admin menu (the Provision icon > Domains) or the System menu (Content > Provisioning > Domains). - Click on the Preferences tab.
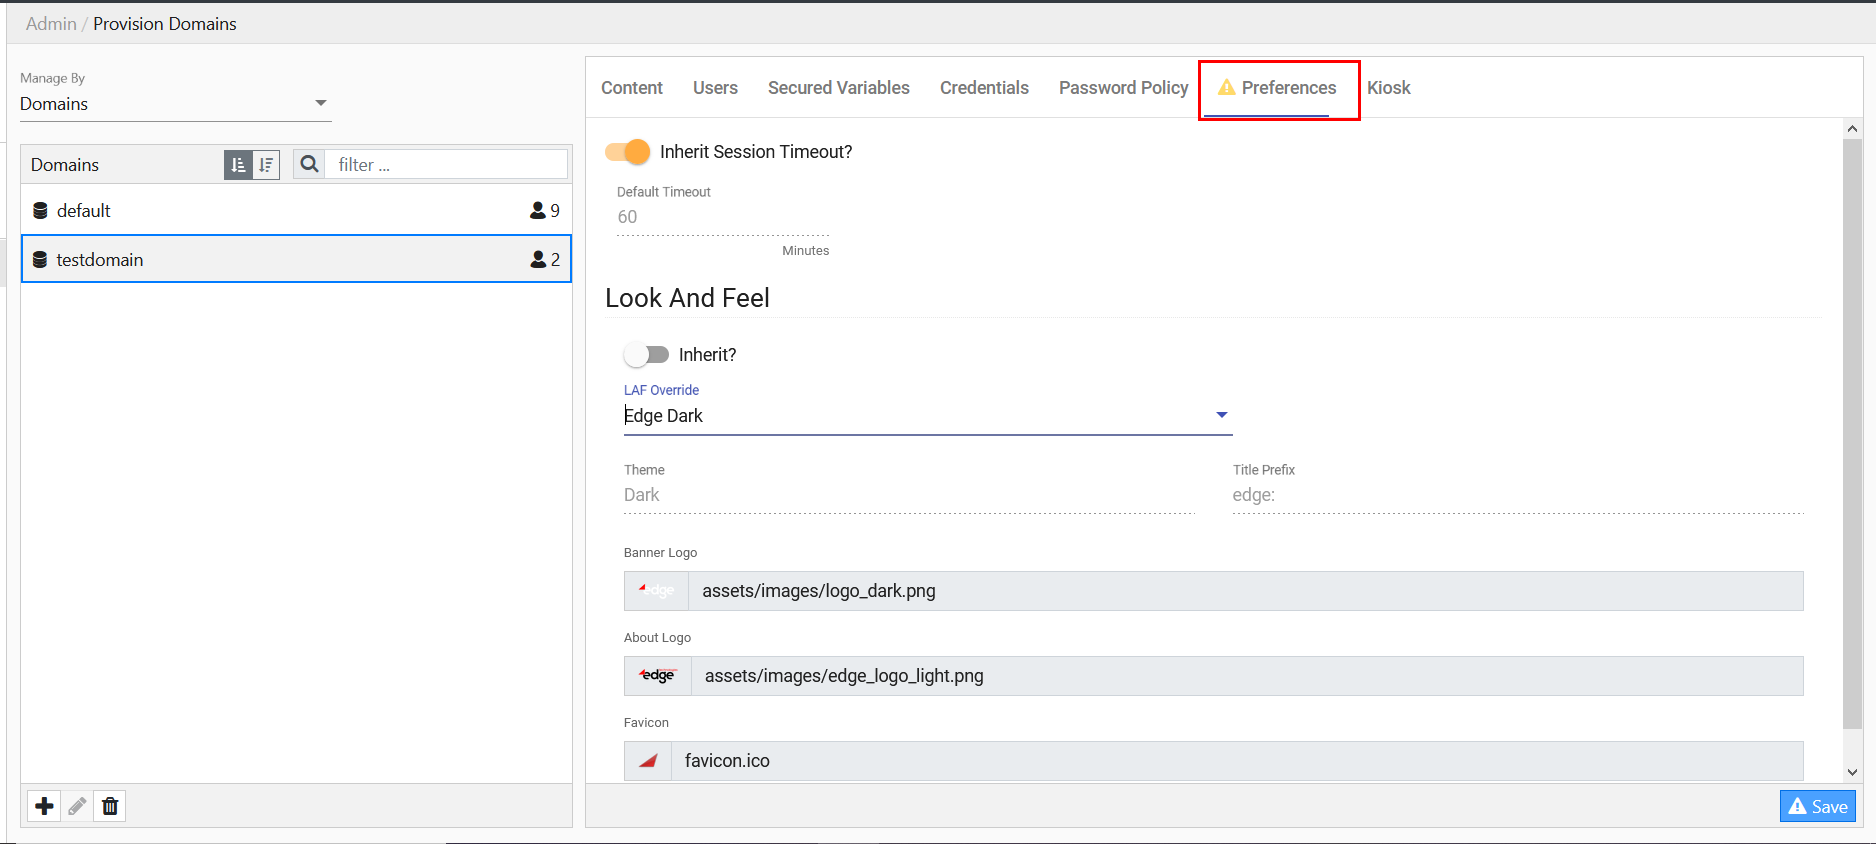
- In the Look and Feel section, enable or disable the Inherit toggle switch.
– If the toggle is enabled, the domain will inherit the default theme.
– If the toggle is disabled, the theme you select from the dropdown will override the default theme.
For example, in the following screenshot, the default theme is Edge Light, but for testdomain we want the dark theme, so we will disable the Inherit toggle and select Edge Dark.
- Save your changes.
Look and Feel Section Details
Look and Feel files are bundled together on the server, so the administrator only needs to point to a directory on the server. If the appropriate file names exist in that directory, then the client will pick them up automatically. If not, then the client will use default edge-branded look and feel elements. If the selected Look and Feel refers to files that do not exist on the server (e.g. the files were somehow deleted), the server will fall back to the system default Look and Feel.
The name of the look and feel directory is the only property that is needed. The rest of the properties are read-only values that show whether appropriate files exist on the server.
Look and Feel properties are as follows:
- Name
Name of the look and feel directory. edgeCore ships with two look and feel directories: Edge Light and Edge Dark.
- Theme
The edgeCore system theme used by the look and feel directory.
- Title Prefix
This property affects the prefix used inside the HTML <title> tag for all pages in the system. The default value for this prefix is “edge:”. A page’s name is concatenated with this string to form a value used as the title in the underlying HTML. For example, if a user clicks on a tab called Summary, then the title for the corresponding page will be “edge: Summary”.
Prefix value + Page Name will appear as the name when bookmarking any page in the system.
- Banner Logo
The logo that appears in the upper left corner of the edgeCore banner bar. By default, this references the system to provide the Edge logo. As a system shipped file, it should not be edited as such changes will be lost upon future upgrades.
- About Logo
The logo used on the About page (accessed via the hamburger menu > System > About) and the System Information page (accessed via the hamburger menu > System > System Info).
- Favicon
The icon displayed next to a page’s title in browser tabs.
Creating a Custom Theme
To create a custom Look and Feel, create a new directory under [Install_Home]/static-web/lookandfeel/.
The name used for this directory will also be the name of the Look and Feel presented in the administrator’s user interface.
The following table contains files that can be placed in this directory. Also, the files in this custom location will be automatically included and restored in backup archives.
| File Name | Description |
bannerLogo.png |
The logo that appears in the upper left corner of the edgeCore banner bar. The system default CSS has a CSS class that sets the banner’s logo height to be 48px. This will resize any bannerLogo.png to be the appropriate height for the banner.
|
aboutLogo.png |
The logo that appears on the About and System Information pages. The system default CSS has a class that sets the logo width to be 320px.
|
favicon.ico |
The icon displayed next to a page’s title in browser tabs. |
override.css |
This is a collection of CSS classes used to override default edgeCore theme values. This file can be used to alter the appearance of the UI, resulting in a custom theme.
You can define as many rules/properties as you like, as long as they follow the correct CSS formatting. For example, to change the banner’s background color, simply add the following property to the override.css file in the appropriate directory:
If, for example, you want to change the text font, you would add the following property:
Note: Using an override.css may break the product. It is recommended to only add overrides as necessary. |
setting.properties |
Contains the following properties:
title.prefix – used for setting the browser’s tab title prefixed with page name. To use the domain name, just reference it with theme.name – the edgeCore system theme to use as the base for this Look and Feel. As previously mentioned, only Light and Dark themes are supported. Example: Note: As of version 4.3.9, theme.name is theme.base ; theme.edge.darklogo – used for setting the Powered by Edge logo in the upper right corner of the page when a custom Look and Feel is used. |
Additionally, make sure you watch our instructional video on how to create a custom theme.
Switching Themes
edgeCore version: 4.3.7
When you switch themes in Provision Defaults > Preferences and save your choice, the change is immediately applied without having to refresh the page.

Editing overrides.css in Custom Themes in the UI
edgeCore version: 4.3.7
When a custom theme is activated and in use, you can make changes to the overrides.css file straight from the UI. The changes are saved directly to the file on the server filesystem. Additionally, the changes are loaded without refreshing the browser.
To edit overrides.css in the UI:
- Go to Provision Defaults > Preferences.
- Click Edit Custom Theme CSS next to the name of the custom theme that you are currently using.
A pop-up containing your theme’s CSS is displayed.
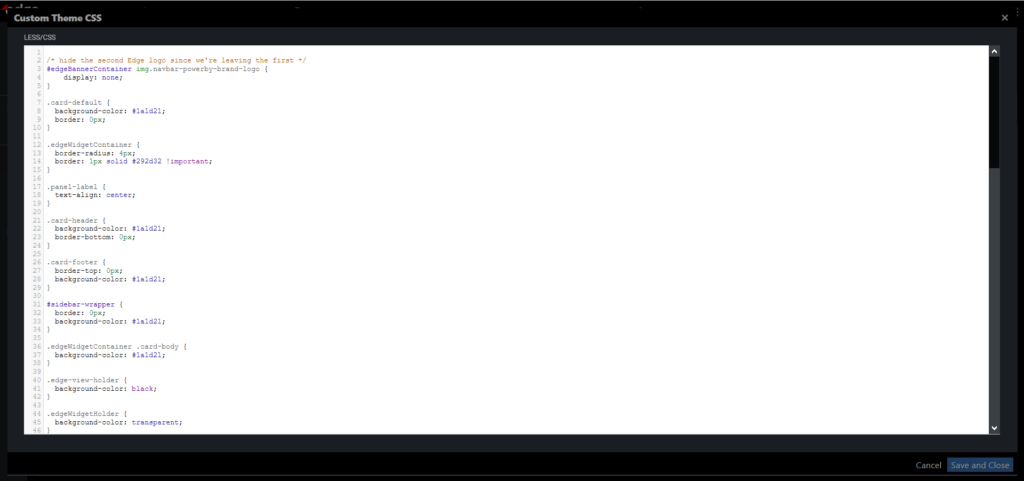
- Modify CSS.
For example, we want the admin sidebar to be red and the Welcome screen to be gray, so we will modify the following:#sidebar-wrapper { border: 0px; background-color: #1a1d21; change to #FF3333 } ….. edge-admin-welcome { background: black; change to gray } - Click Save and Close.
The changes are immediately applied to the sidebar and Welcome screen.
Adjusting Breadcrumb Bar Size
edgeCore version: 4.3.7
You can change the breadcrumb bar size to minimize unused space and provide more space for visualizations. Changing the breadcrumb bar size reduces the following:
– padding in the breadcrumb bar
– font size and icon sizes
– size of the page picker on Manage Pages
To change the breadcrumb bar size, set the following in the custom theme’s settings.properties file:
banner.size=x
breadcrumb.size=x
vis.header.size=x
X can be: 1, 2, 3, or 4. 1 and 2 are most compact, whereas 3 and 4 are normal.
Moreover, the breadcrumb bar size can also be set in local.properties (client.breadcrumbSize=x) and in the system menu > Admin Tools > System Config.
Adjusting Banner Size
edgeCore version: 4.3.7
Changing the banner size reduces the following:
– padding in the banner
– font size and icon sizes
– padding inside the menu items
– size of the product icon
To change the banner size, set the following in the custom theme’s settings.properties file:
banner.size=x
X can be: 1, 2, 3, or 4. 1 and 2 are most compact, whereas 3 and 4 are normal.
Moreover, the banner size can also be set in local.properties (client.bannerSize=x) and in the system menu > Admin Tools > System Config.
Adjusting Visualization Header Size
edgeCore version: 4.3.7
Changing the visualization header size reduces the following:
– padding in the header
– font size and icon sizes
– size of the switch visualization dropdown when enabled
To change the visualization header size, set the following in the custom theme’s settings.properties file:
vis.headerSize=x
X can be: 1, 2, 3, or 4. 1 and 2 are most compact, whereas 3 and 4 are normal.
Moreover, the visualization header size can also be set in local.properties (client.vis.headerSize=x) and in the system menu > Admin Tools > System Config.
Theme Management UI
edgeCore 4.3.9 version
This page is accessed in the system menu > Manage > Theme Management.
By default, the Full Admin role has the permission to manage themes. If you want other roles to have this permission, you need to grant them the Manage Themes permission in Provision Roles > Permissions.
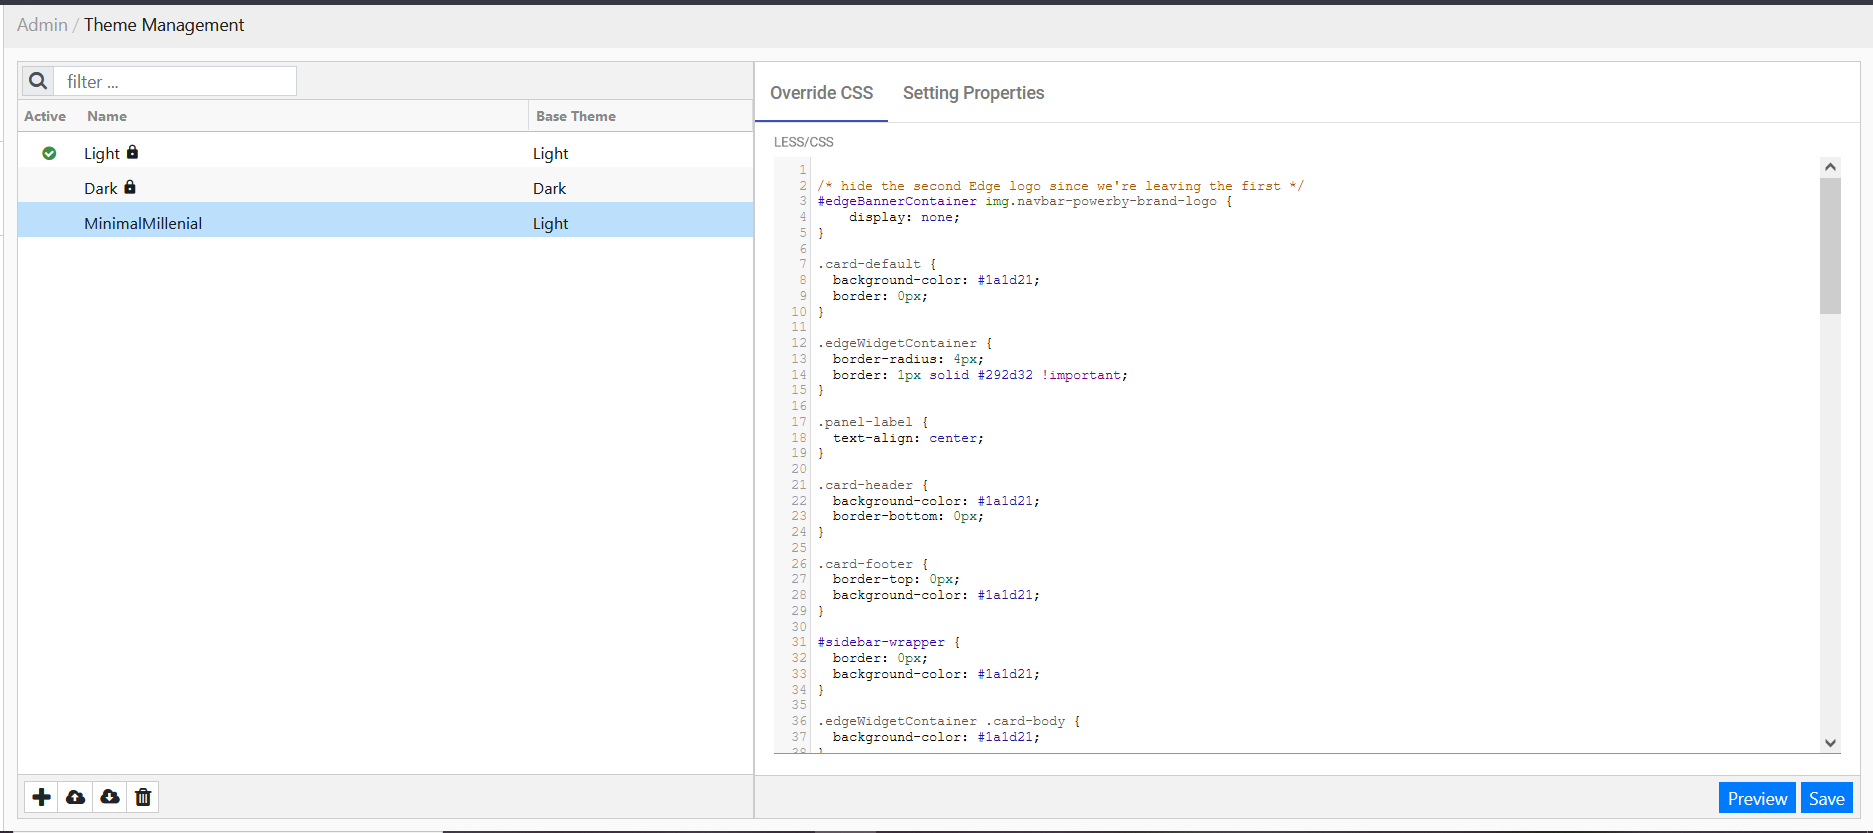
Here you can:
- Create new themes

- Download the created/uploaded themes

- Upload themes

- Delete uploaded themes

- Edit both the custom CSS and the setting.properties file
– Upon clicking on the created/uploaded theme on the left side, the right side populates two tabs — Override CSS and Setting Properties where you can edit CSS and settings; - Test themes without affecting any other users on the system
– After creating and/or editing the CSS and settings, you can preview the theme to see what it will look like;
Creating a New Theme in the UI
To create a new custom theme in Theme Management, take the following steps:
- Click + in the bottom-left corner.
A pop-up is displayed. - In the pop-up, provide the following:
a) In Theme Name, enter a unique name for your theme.
b) In Theme Base, select the theme that will serve as a foundation — Light or Dark.
c) Enable or disable the Theme Edge Dark Logo toggle switch depending on whether you want to use the dark logo in the upper left corner.
d) Click Save.
The created theme is displayed in the list of themes. - Click on the theme.
The right side of the page populates two tabs — Override CSS and Setting Properties.
– In Override CSS, you can enter and edit the custom CSS.
Example:/* overrides for Custom Theming */ #edgeBannerContainer { background-color: #a04000!important; } .edgeMenuBarTabLabel { font-weight: bold; } .active-page-link { background-color: green; }– In Setting Properties, you can edit the setting.properties file. Properties include the following: Theme Base, Title Prefix, Theme Edge Dark Logo, Banner Size, Breadcrumb Size, Visualization Header Size, and Layout Padding Size.
- After making changes:
– preview the theme by double-clicking on it or by clicking Preview to see what it will look like, without affecting other users;
– save the changes/theme;
The new theme will be applied locally until you refresh the page. Once you decide on the theme you want to use globally, you need to set it in Provision Defaults > Preferences > Look and Feel > Name.
Editing a Theme in the UI
Light and Dark system themes cannot be edited, only the custom ones can.
To edit a custom theme:
- On the left side of the page, click on a custom theme you want to edit.
The right side of the page is populated with the theme’s CSS and setting properties. - In Override CSS, change the existing CSS or add additional code.
- In Setting Properties, change the properties you want.
Available properties are as follows: Theme Base, Title Prefix, Theme Edge Dark Logo, Banner Size, Breadcrumb Size, Visualization Header Size, and Layout Padding Size. - Click Preview to see what the theme will look like.
- Save your theme once you are done making changes.
The theme will be applied locally until you refresh the page. To set it on a global level, go to Provision Defaults > Preferences > Look and Feel > Name.
Changing the Color between Visualizations
The following CSS example is used to change the gaps between visualizations to black:
edge-view-page {
    background-color: #00000!important;
}