Overview
Roles are an abstract grouping of users and Content and provide a way to provision Content across Domains. For example, an administrator may many want all “Executive” users to get the same set of pages, regardless of what Domain they belong to. This is achieved by:
- Creating an “Executive” Role in the system
- Assigning relevant content to that “Executive” Role
- Giving specific users in the system membership to the “Executive” Role.
Multiple Roles can be assigned to users, either directly at the User level, or inherited through a user’s Domain. When a user logs into the system, they do not assume a specific role. The system determines all of the Content assigned to all of his or her Roles, and presents an aggregate view of all of that Content.
Creating a New Role
To create a new Role, follow the steps below:
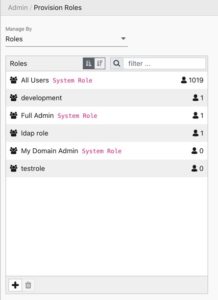
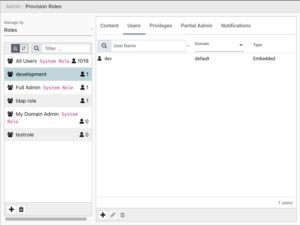
- Go to the Manage By: Roles panel, as detailed under Provisioning.
- On the Provision Roles page, click the
+button in the bottom-left of the Roles panel. - In the Add Role dialog that appears, enter the Name of the new Role.
- Click “Save and Close” to finish adding the role and close the dialog.
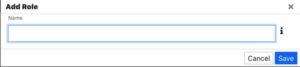
Role names are required to be unique.
Deleting an Existing Role
To delete an existing role, follow the steps below:
- On the Provision Roles page, click the Role you wish to delete.
- Once you have selected the Role, click the “Delete” icon.
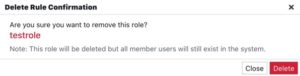
- In the Remove Role Confirmation dialog that appears, click “Remove” to finish deleting the Role.
Deleting a Role will remove it from the system, but all associated users and content will remain. Their association to the Role will be lost.
- All Users associated with the deleted Role will remain in the system.
- All Pages associated with the deleted Role will remain in the system.
Provisioning Content to a Role
To provision Content to a Role, follow the steps below:
- Click the Role to which you wish to provision Content.
- Once you have selected the Role, on the right side of the page select the Content tab.
- In the content tree that is displayed, use the checkboxes to provision files and folders, clicking the arrows to expand folders as needed.
- Click “Save” to lock in the changes.
Provisioning Partial Admin rights for a Role
To grant permission for Users in a Role to manage other Users:
- Click the Role to which you wish to provision Partial Admin.
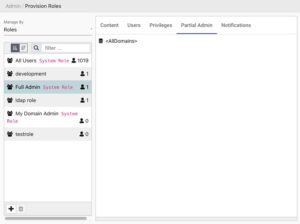
- Once you have selected the Role, on the right side of the page select the Partial Admin tab.
- The Partial Admin tab will display the domains the role can currently manage.
- Click the
+button at the bottom of the Partial Admin tab to add more domains, or select a domain and click the delete button to remove one. - Click “Save” to lock in the changes.
Special domain placeholder for Partial Admin
There are 2 special domains that can be selected for Partial Admin provisioning: <AllDomains> and <MyDomain>
- <AllDomains> – granting this option to any Role grants Partial Admin privileges for Users in all Domains.
- <MyDomain> – granting this option to any Role grants Partial Admin privileges for Users in the admin User’s Domain.
Managing Users for a Role
To add, edit, or delete Users from a Role, follow the steps below:
- On the Provision Roles page, click the Role for which you wish to manage Users.
- Once you have selected the Role, on the right side of the page select the Users tab.
Adding Users to a Role
From the Role perspective, you can only add associations to Users that are already in the system. (To add a new user to the System you would need to first switch to the Manage By: User, or Manage By: Domain perspective.)
To add Users to a Role, follow the steps below:
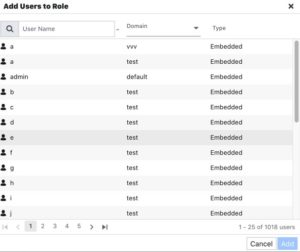
- Click the
+button at the bottom of the panel. - In the Add Users To Role dialog that appears, select one or more Users from the list of existing Users (example shown above).
- Click “Save and Close” when done.
Adding a User to a Role is equivalent to adding a Role to a User.
Editing a User in a Role
Although you can’t “Add” a new User to the system while in the Role perspective, you can “Edit” existing Users because they already belong to a specific Domain.
To edit a User, follow the steps below:
- Select the User from the list of Users on the right side of the page.
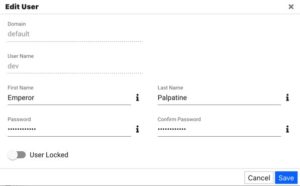
- Click the “Edit” icon.
- Update the user details in the Edit User dialog that appears
- Click “Save and Close” when done.
Removing a User from a Role
To remove a User from a Role, follow the steps below:
- Select a User from the list of Users on the right side of the page.
- Click the “Delete” icon.
From the Role perspective, in the above example you are only removing the association to a User who is already in the system. (To completely remove a User from the system, you would need to first switch to the Manage By: User or Manage By: Domain perspective.)
Removing a User from Role does not delete a user from the system. It only removes an association to the selected Role.