To create and test a JavaScript action, do the following:
Step 1: Create a JavaScript connection
- Click
 .
.
The Connections page is displayed. - Click + in the lower-left corner to create a new connection.
A pop-up for choosing a connection type is displayed. - In the pop-up, select JavaScript.
- Click Use Selected.
A new page is displayed. - In Connection Name, enter a name (for example, JS).
- Make sure the Enable Connection toggle is on and click Next.
You are taken to the Test Connection tab where the confirmation message Connection test was successful is displayed. - Click Save and Close.
The newly created connection is displayed in the list of Connections and in the Pipeline.
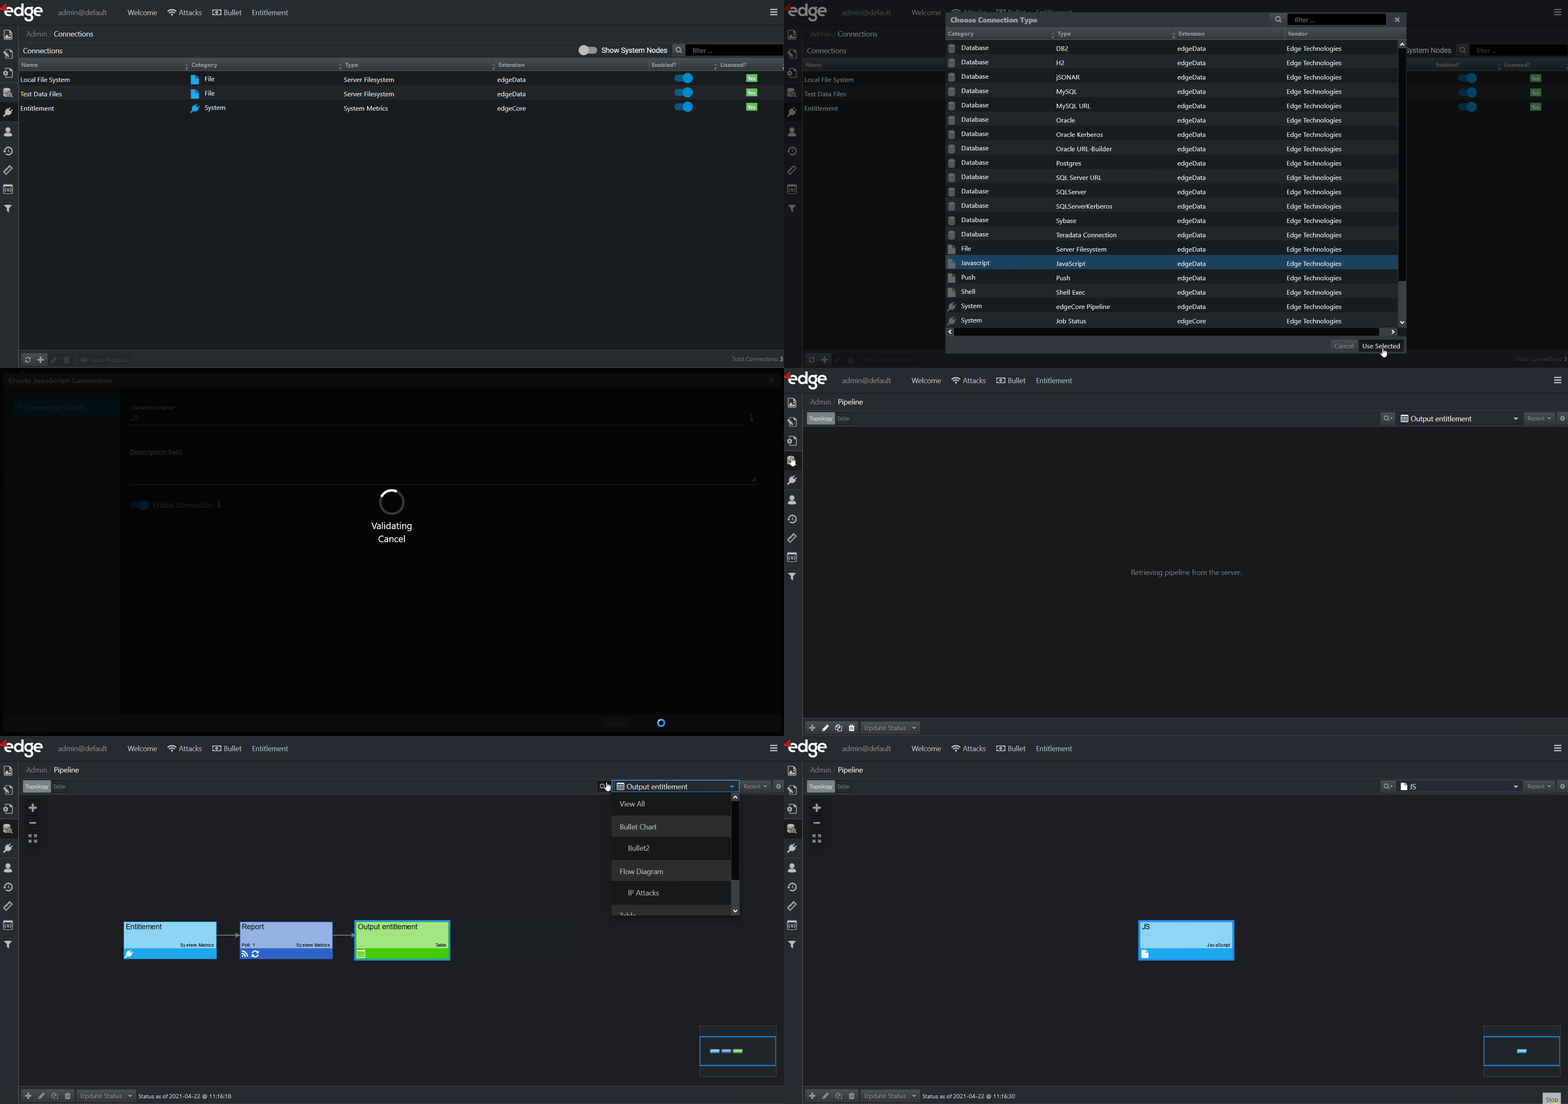
Step 2: Create a Server Action off of the JS Connection
- Click the gear icon button in the previously created JS connection.
- Select + and then New Server Action.
A new page is displayed. - On the Configure tab, do the following:
a) In Action Name, enter a name for the action (for example, JavaScript action).
b) Enable or disable the Wait for server response toggle switch.
If enabled, the user will be blocked from interacting with the user interface until the action is completed. If disabled, the user can continue interacting with the user interface and will be notified via a message when the server action is completed.
c) In User Notification, specify whether the user should be notified when the server action is completed.
– If always is selected, the user will be notified whenever the server action is completed successfully or when there is an error.
– If never is selected, all messages for the server action will be suppressed.
– If on error is selected, the user will be notified when there is an error.
d) Click Next.
You are taken to the Script References tab.
e) In Script References, you can declare any references the script makes to resources on the filesystem or otherwise, which would be required to be included in any partial backups made where this JavaScript feed is involved.
– Secured Variables: If you have configured Secured Variables in the system, you can include them here to filter the data that will be returned based on what user is accessing this action. For more information, refer to Configuring Secured Variables. To access a variable in the script, use secVars.varName.
– Java Libraries: If the action’s script contains any references to Java library code that depends on any libraries installed in the[INSTALL_HOME]/libdirectory, then they should be selected here.
– JavaScript Libraries: If the action’s script contains any references to user-supplied JavaScript libraries/modules/files, they should be selected here. The supported locations within[INSTALL_HOME]are/data,/scripts,/static-web, and/login. Any files with the.jsextension within these directory trees will be made available for selection here. - On the Script tab, do the following:
a) In Script, enter your JavaScript code.
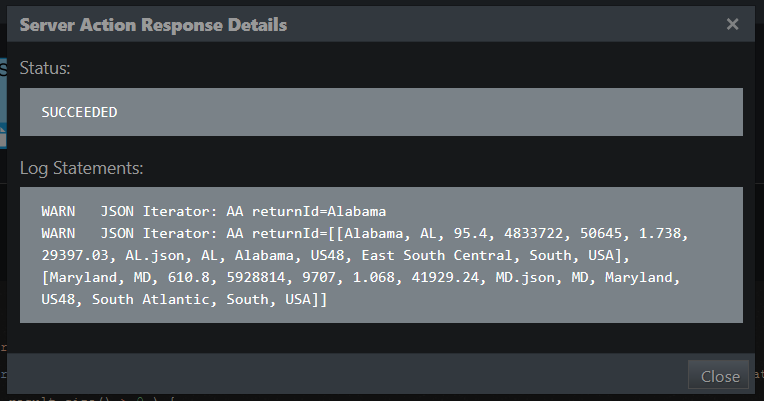
Example:function main(actionId, actionName, nodeVars, secVars) { var params = makeParameterValueList({ "state": "MD", "parentDesc": "aa", "childId": "bb", "childDesc": "cc" }); returnId = ''; var result = dataProducerService.fetch( 'MapRegionFeed' params.getParameterValues(), null ).getData(); if ( result.size() > 0 ) { var iter = result.iterator(); var firstRecord = iter.next(); //firstRecord = iter.next(); //returnId = firstRecord.getValue( 'ReturnValue' ); logger.warn( ' JSON Iterator: AA returnId=' + firstRecord.getValue( 'Name' ) ); } logger.warn( ' JSON Iterator: AA returnId=' + result ); return makeActionSuccessResult(); // optionally return makeActionSuccessResult("success details") // optionally return makeActionFailureResult("failure details")b) Click Test Server Action to execute the action and see the result/status.
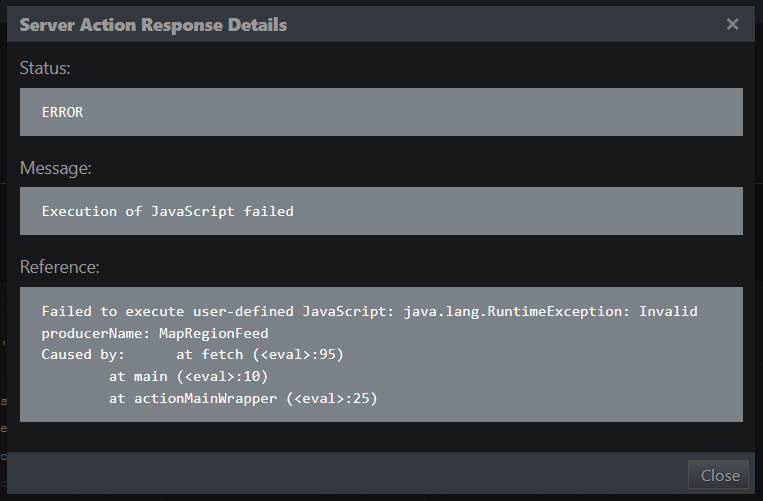
The status of the action can be: SUCCEEDED, FAILED, or ERROR.
If there is an error, the Reference field will provide additional details.
- Click Next.
You are taken to the Refresh tab. Here you can specify whether any Feeds should be updated after the server action is performed. When you add a Feed to this list, any dataset off of that Feed will automatically refresh. - Click Save and Close.
The created action is displayed in the Pipeline.
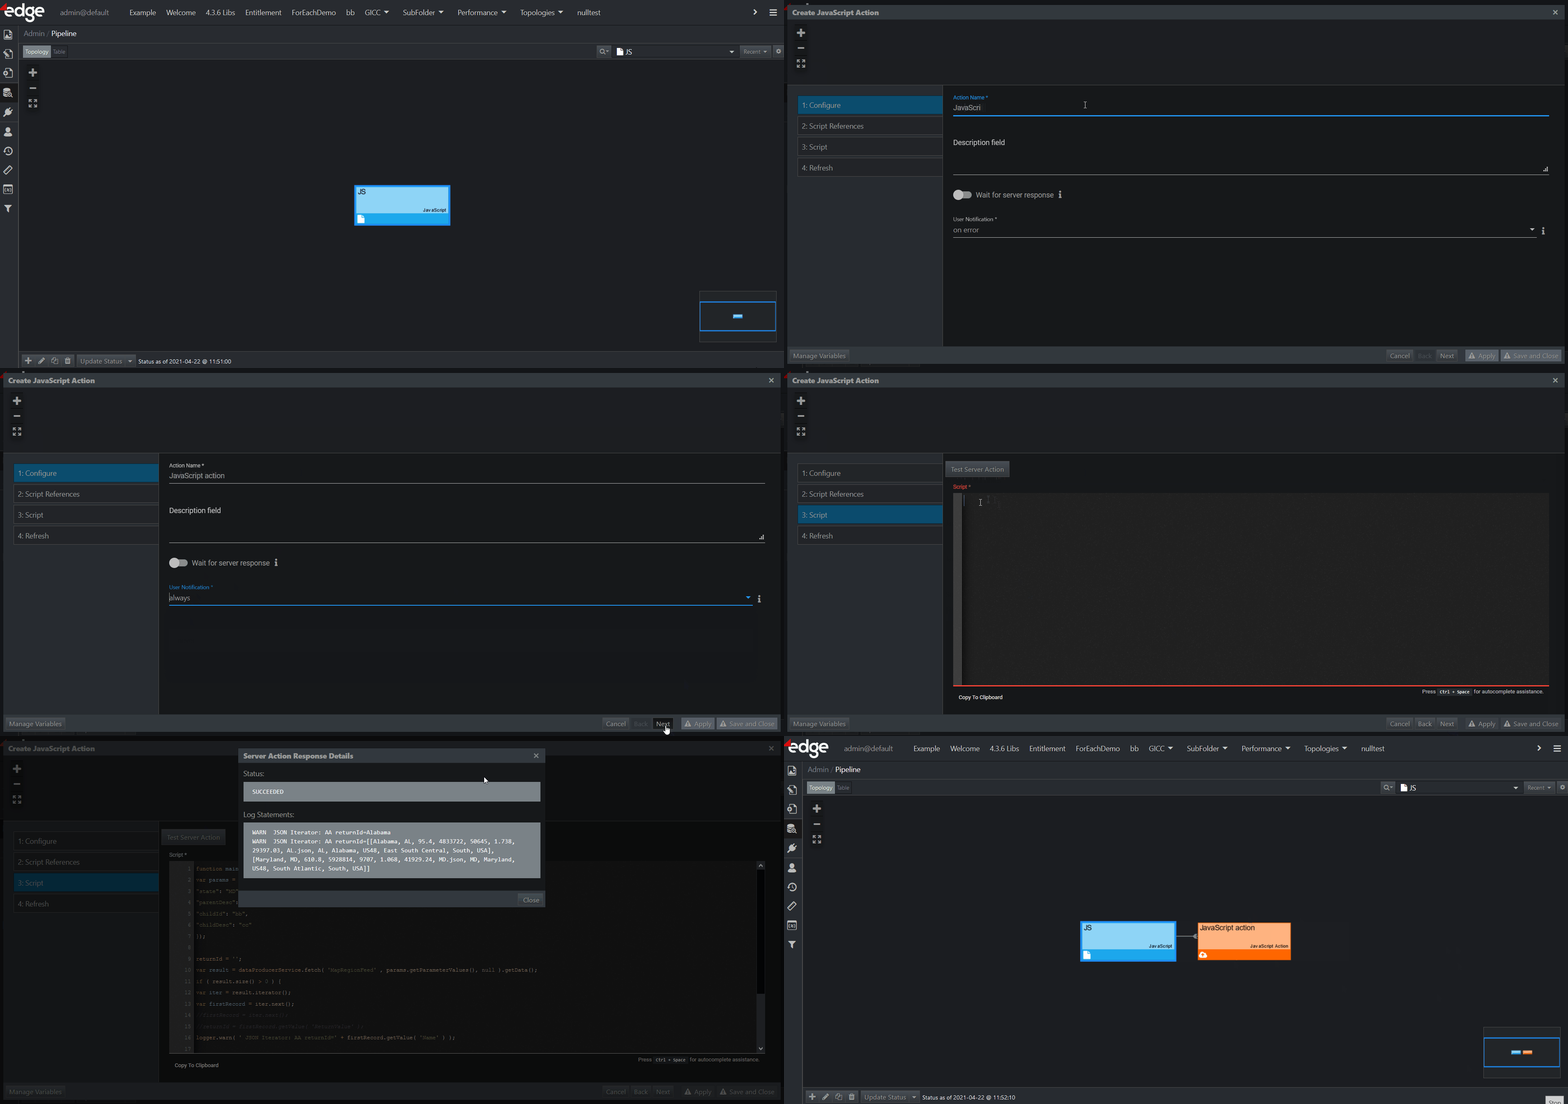
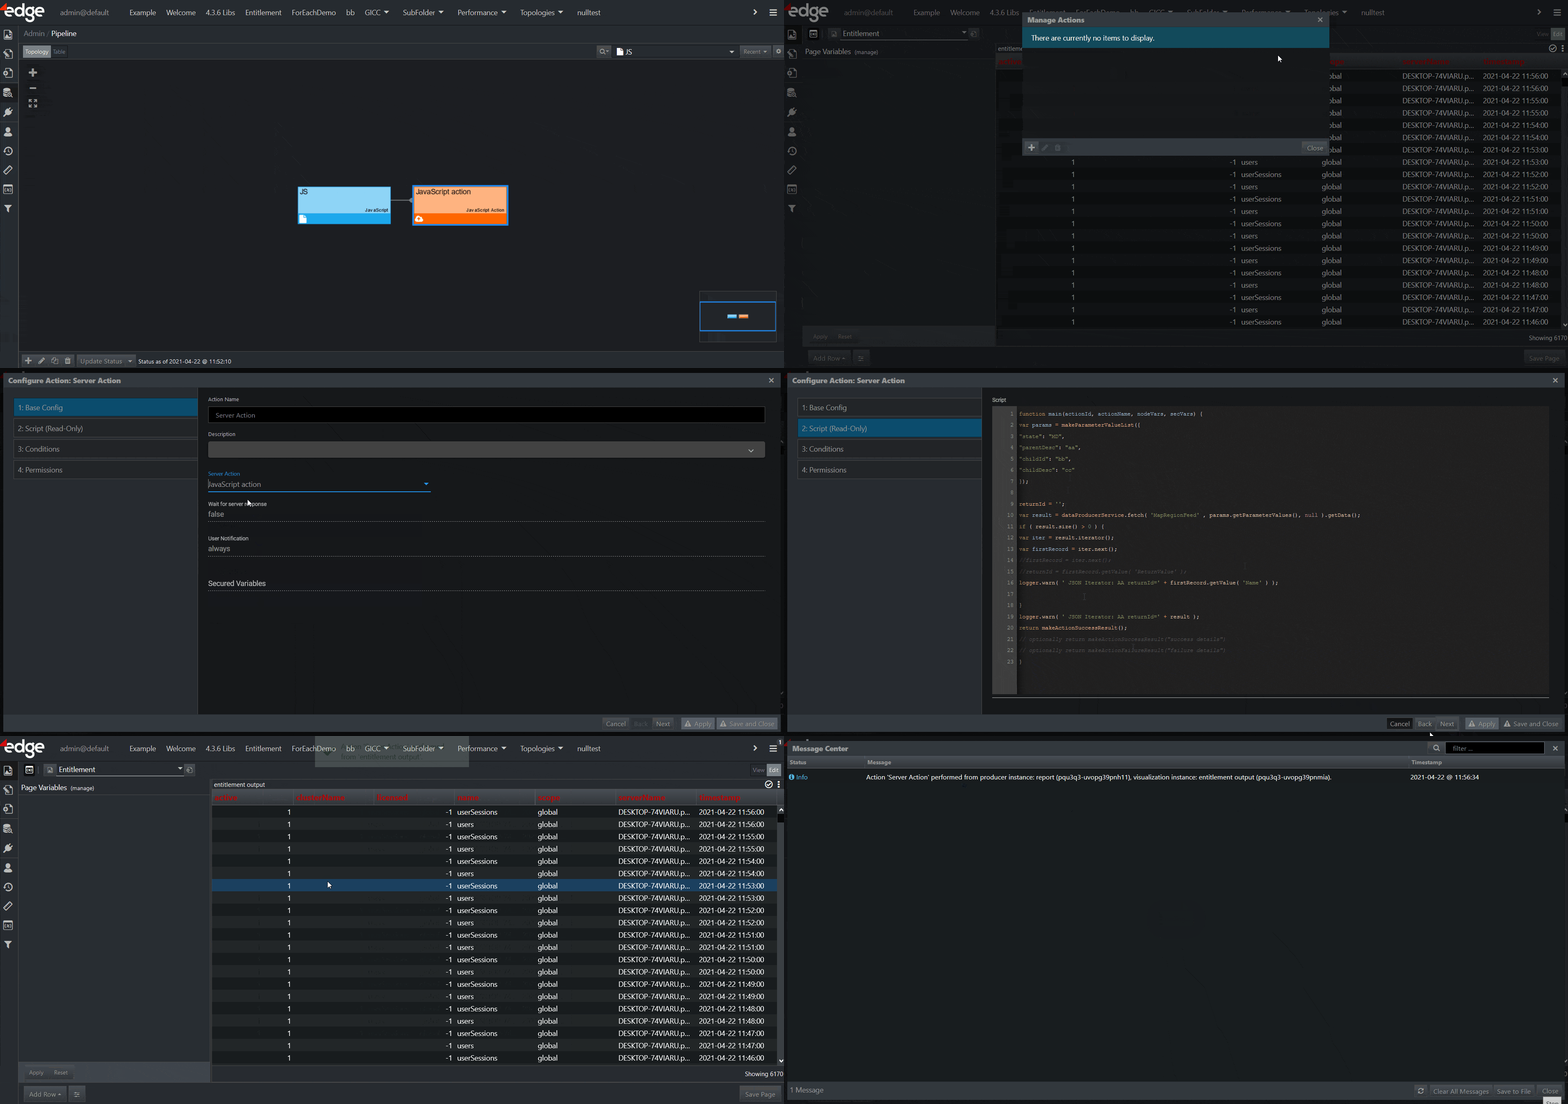
Step 3: Add the JS Action to any Visualization
- Go to any page that contains a visualization.
For the purpose of this exercise, we have chosen a table visualization. - Click Edit in the upper right corner.
You are now in the Edit mode. - In the visualization, click the three dots and select Edit Actions.
A pop-up is displayed. - In the pop-up, click + > Click Row > Server Action.
A new page is displayed. - On the Base Config tab, do the following:
a) In Server Action, select the JS action you previously created.
The server action details you have set are displayed (Wait for server response and User Notification).
b) Click Next.
You are taken to the Script (Read-Only) tab, where your JS code is displayed. Click Next to proceed. No changes are needed on the Conditions tab, so click Next. On the Permissions tab, you can exclude certain roles from accessing the action you are creating, but in this case, leave the Allow all users access to action toggle switch on. - Click Save and Close.
The action you have just created is displayed in the Manage Actions pop-up. - In the pop-up, click Close.
- Click on any row in the visualization to perform the server action.
Since we have configured the action to always notify the user, a message is displayed in the banner. Additionally, a more detailed message is also logged in the system menu > Messages.
Related page: Server Action
