Here you will do the following:
- Create a new type of component in edgeCore
- Use JavaScript in an HTML Template Visualization
- Implement a Show Record Details action
In this exercise, you are going to use an HTML Template Visualization to create a new type of component in edgeCore. The List Visualization that you created earlier allows a user to scroll through a list and click on an item. Sometimes it may be preferable to have a “quick-select” list that drops down a list of items for selection. In this type of selector, the user can also type to filter the list. Moreover, you will also see a simple example of how to implement JavaScript as part of the HTML Template configuration. Finally, you will learn how to download the configuration of an HTML Template Visualization to save it for future use.
Create an HTML Template Visualization
You will create an HTML Template Visualization that will generate the Quick-select component.
Perform the following steps to create an HTML Template Visualization:
- In the previously created National Park Summary CSV Feed box, click the gear icon button and then select + > New Visualization > HTML Template.
- In the Configure tab, in Name, provide a name (for example, Park Quick Select).
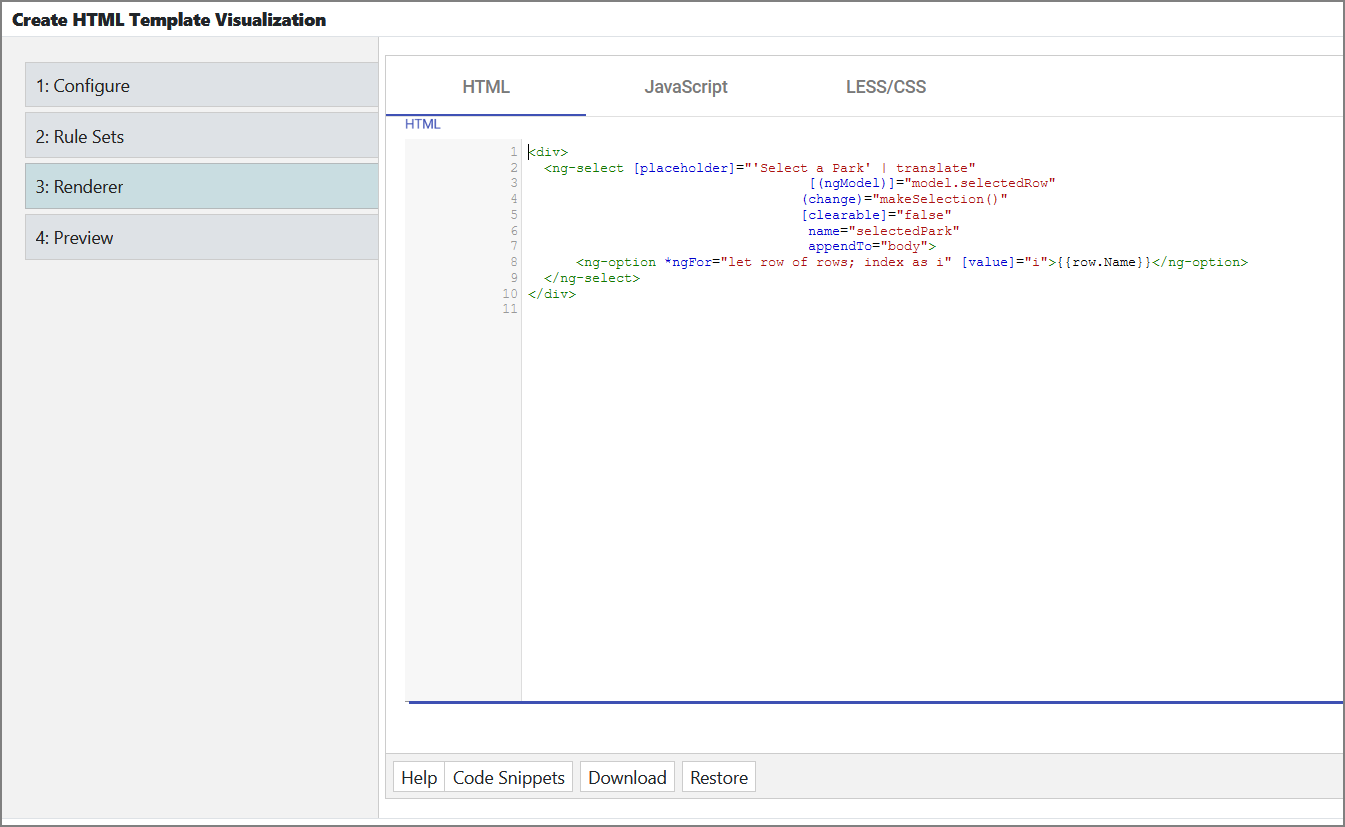
- In the Renderer tab, do the following:
a) In HTML, enter the following code:<div> <ng-select [placeholder]="'Select a Park' | translate" [(ngModel)]="model.selectedRow" (change)="makeSelection()" [clearable]="false" name="selectedPark" appendTo="body"> <ng-option *ngFor="let row of rows; index as i" [value]="i">{{row.Name}}</ng-option> </ng-select> </div>b) In JavaScript, enter the following code:
component.model = {selectedRow: null};
component.makeSelection = () => {
    var row = component.rows[component.model.selectedRow];
    if (row) {
      component.fireRowClickEvent(row);
      //console.log(row);
    }
};
c) In LESS/CSS, enter the following code:
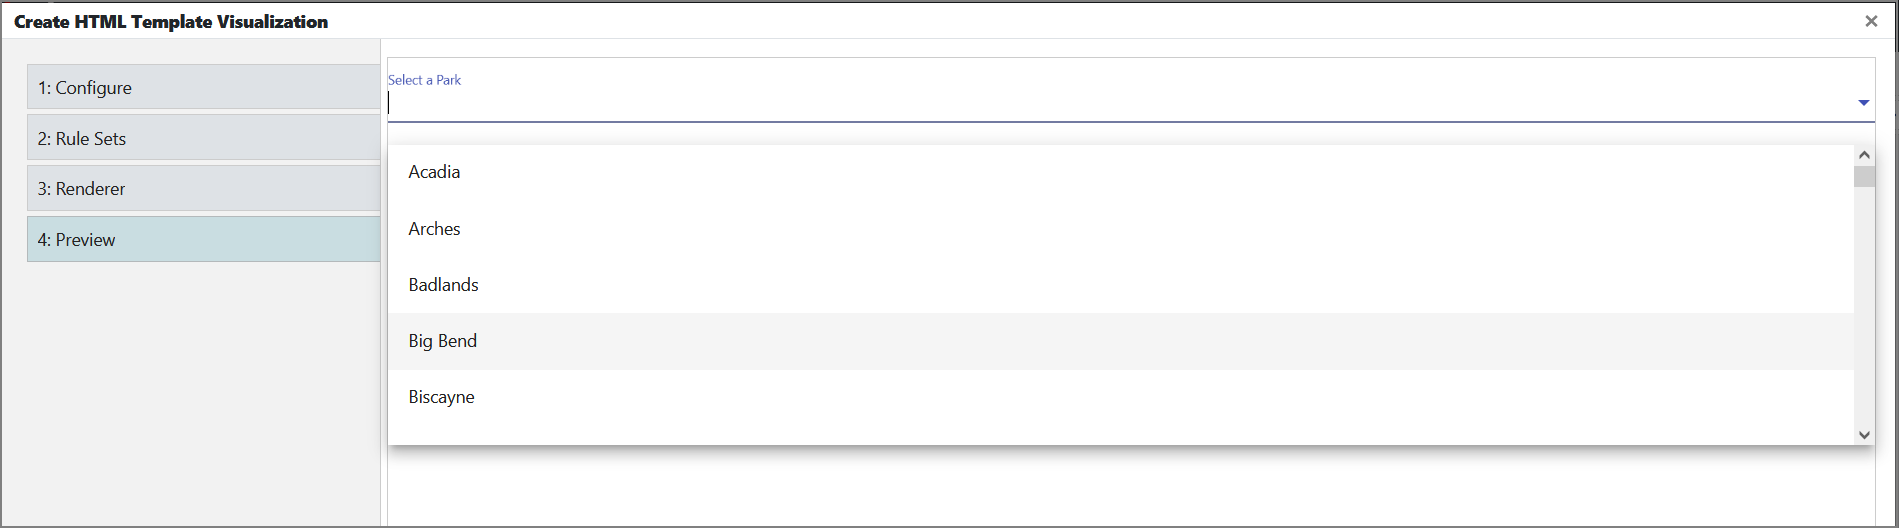
.qaselectcontainer { padding: 20px; } - Go to Preview, where you can observe the HTML component showing a drop-down selector pre-populated with park names.
- Go back to the Renderer tab and click Download. A JSON file is downloaded, saving the full HTML Template configuration for future use.
- Go to Preview again and click Save and Close.
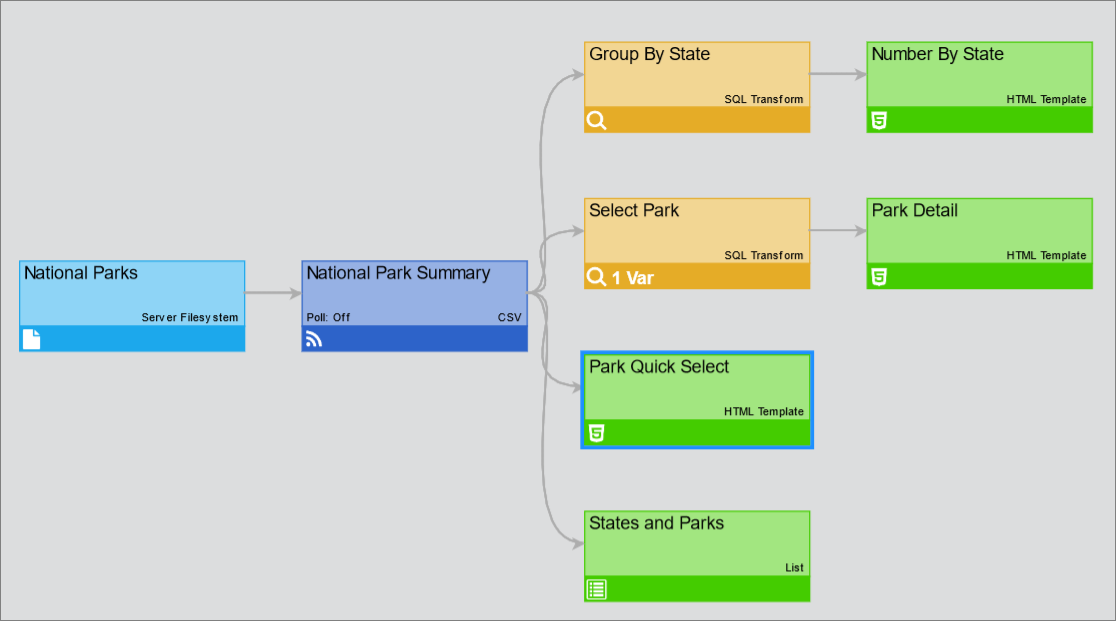
The pipeline looks like this now:
- Add the created HTML visualization to the National Parks page. Place it wherever you see fit and save the page.
Create a Show Record Details Action
To complete this exercise, you will attach an action to the Quick-select HTML visualization that will show a pop-up with various details for the selected park.
Perform the following steps:
- In the Park Quick Select HTML Visualization, click the three dots and select Edit Actions.
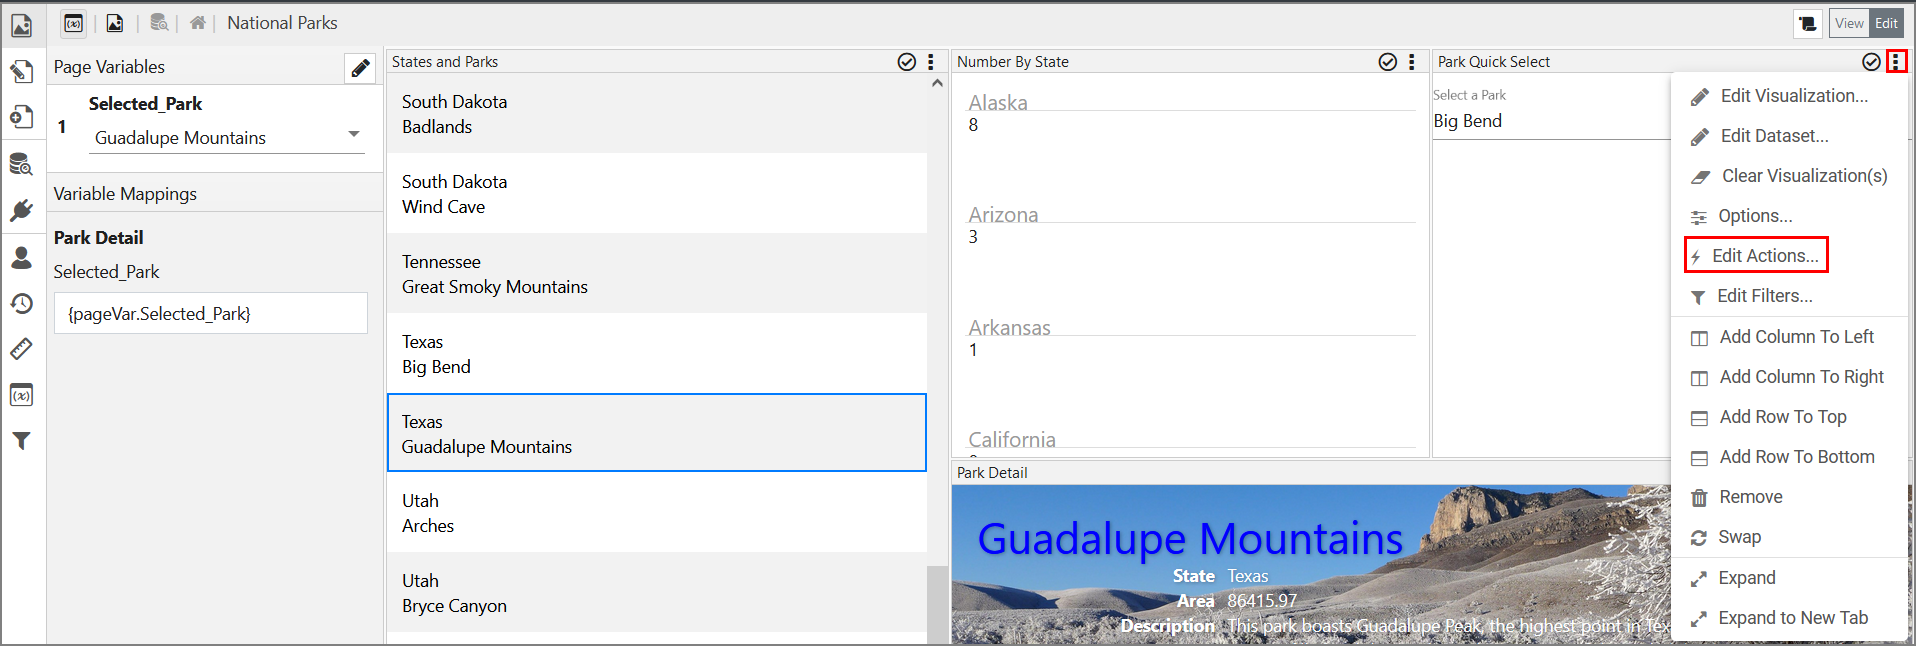
A pop-up is displayed. - In the pop-up, click + > Click Row > Show Record Details.
A new page is displayed. - In Action Name, enter Show Park Details.
- (Optional) Enable the Always Show In Menu toggle switch to see the action in the menu once it is created. As a result, the action will be shown upon clicking the item.
- In Field Visibility, do the following:
– Click the Move all to right icon next to Displayed Fields to move all of the fields from Displayed Fields to Hidden Fields.
– Click each of the following fields to move them back to Displayed Fields: Description, Name, State.
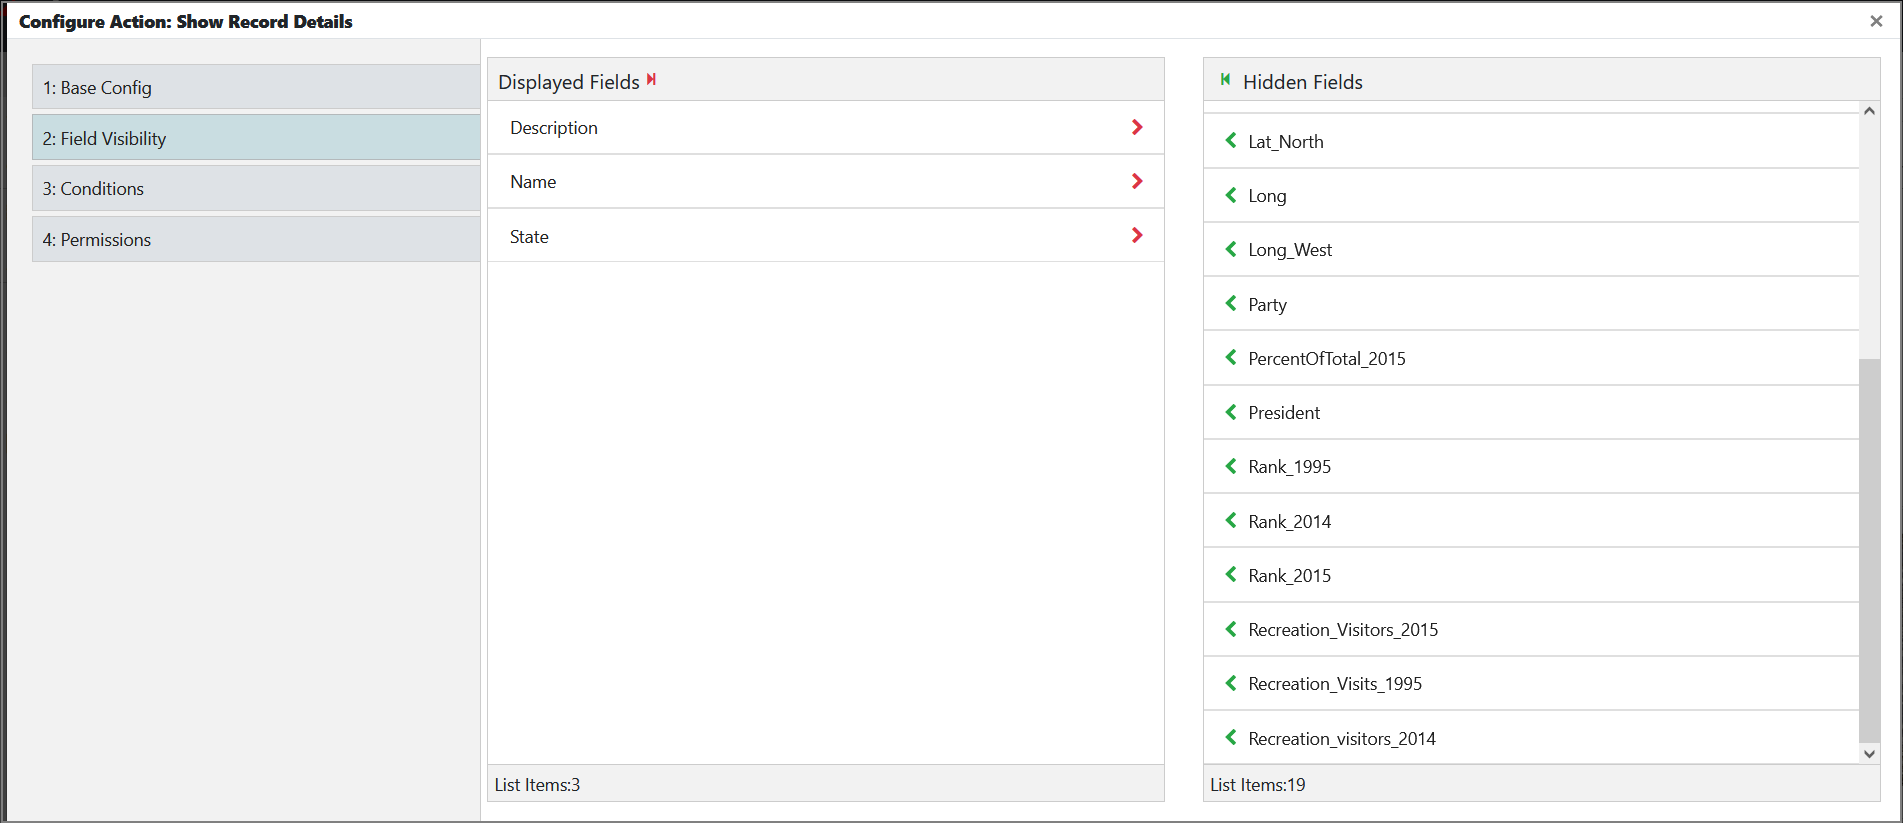
- Click Next.
No changes are needed in Conditions or Permissions. - Click Save and Close.
The action is displayed in the pop-up. Close the pop-up.
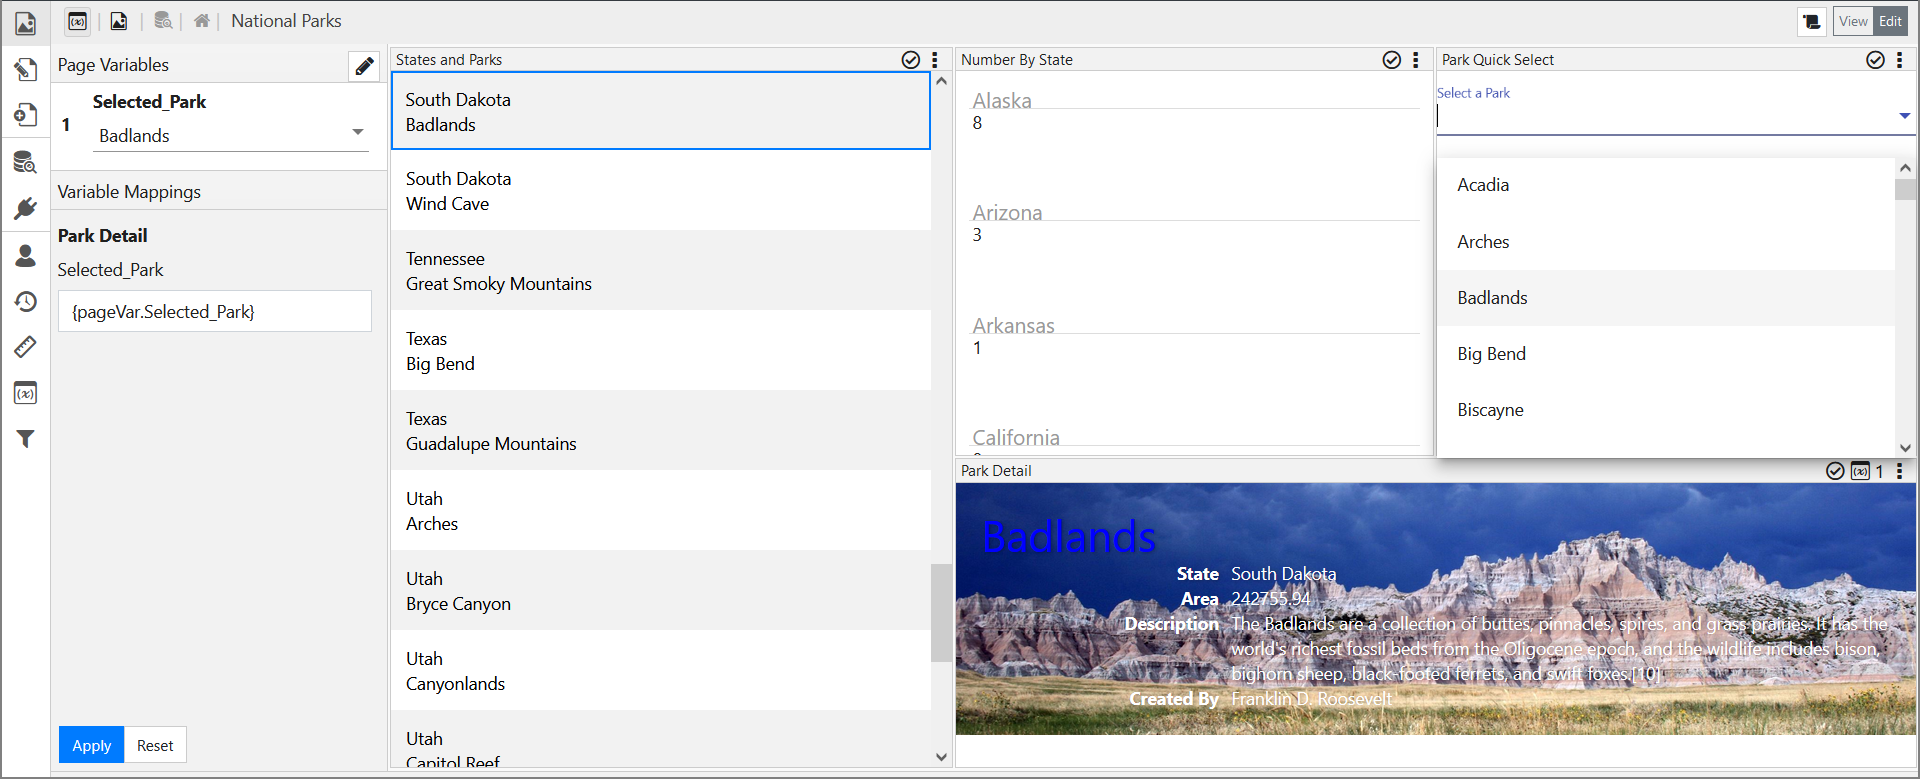
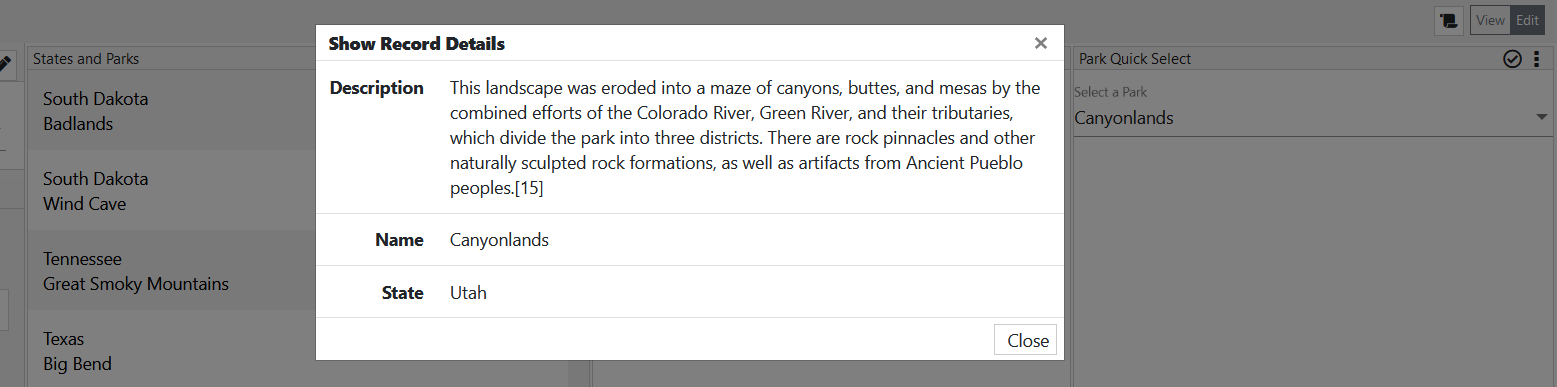
To validate the Show Record Details Action, click to select any park in the Park Quick Select dropdown. Note that you can type in the dropdown to filter the list. Observe that the detail for the selected park is shown.
- Close the pop-up.