A Full Backup saves the entire system. It creates a snapshot of a moment in time and allows you to restore the system back to that state.
Contents of a Full Backup
A typical edgeCore deployment will consist of many different layers of configuration.
| Content Types | Description |
|---|---|
| Data | A collection of data sets that transform raw data into something that can be presented on a page. These can be seen in the pipeline. 1. Connections 2. Feeds and Transforms a. Node Variables b. Secured Variables c. Constraints 3. Write-Back Actions |
| Visualizations | A set of rules and configurations, tied to a specific data set, that defines how data is presented. 1. All Rule Sets referenced by renderers inside Visualizations 2. All Color Palettes referenced by renderers. |
| Pages | A group of Visualization instances that display data from various sources. 1. Page configuration, such as layout options. 2. Page Variables used to expose Node Variables required by underlying queries. 3. Visualization Instances included on the page. 4. Actions associated with Visualization instances on the Page. |
| Users | Provisioning information for the system: 1. Domains 2. Roles 3. Users |
| License | License information for the system. |
| Custom Folders | All custom assets included on the server’s filesystem: 1. Data files (CSV, JSON, XML, XLSX) 2. Web rules 3. Modules 4. Scripts 5. Custom libraries 6. Images 7. Custom translation packs |
Exporting a Full Backup will capture all the configuration listed above. It does not capture some external support artifacts such as:
- Additional external databases
- Database Drivers
- Scripts outside the scripts folder
The above artifacts are beyond the scope of the product itself, but they should be considered from an overall deployment perspective.
Creating a Full Backup
Refer to the information provided on the Backup and Restore page.
Restoring a Full Backup
To access the Backup & Restore page, you can either:
- click
 in the Admin menu (the vertical bar that runs down the left side of an administrator’s screen);
 - click the hamburger menu > Content > Backup & Restore;
To restore a backup, select an item in the list, and activate the Restore Wizard by either clicking the Restore button in the bottom right corner or double-clicking the item in the list. The wizard’s steps are described below.
Step 1: Restore Options
This dialog provides several options that affect how the backup will be applied.
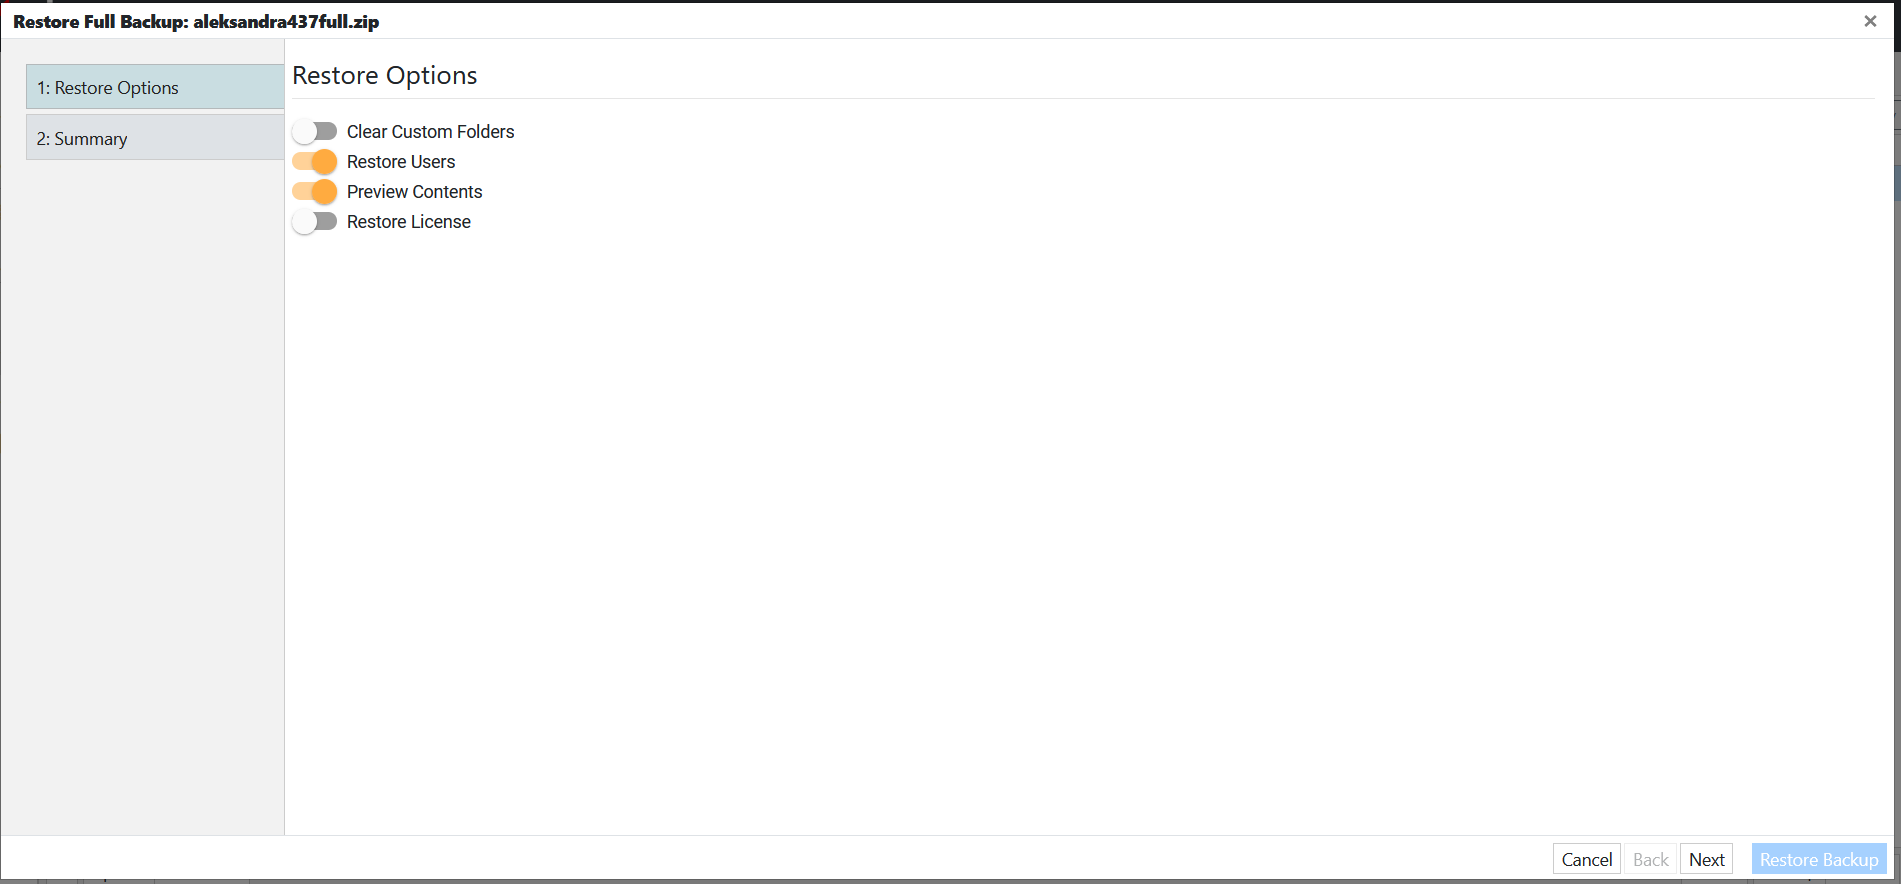
The options are as follows:
- Clear Custom Folders
Determines how to handle custom (filesystem) content on the current system. When this toggle switch is enabled, all static content, data files, web rules, modules, scripts, custom libraries, images, and custom translation packs will be removed. When it is disabled, custom content will remain on the system. This is the recommended option in most cases. - Restore Users
Determines how to handle provisioning information on the current system. When this toggle switch is enabled, all domains, roles, and users on the active server with the contents from the archive will be overwritten. When it is disabled, user content from the archive will be ignored. The domains, roles, and users currently on the system will remain intact. This is the recommended option. - Preview Contents
Determines whether to show a preview of contents prior to restoring. When this toggle switch is enabled, a preview will be shown. This is the recommended option. When it is disabled, the preview will be skipped. Displaying a preview for large backups can take some time. - Restore License
Determines how to handle license information on the current system. When this toggle switch is enabled, the license information on the active server will be overwritten with the license from the archive. When it is disabled, the license information in the archive is ignored. The license information on the current system will remain intact. This is the recommended option.
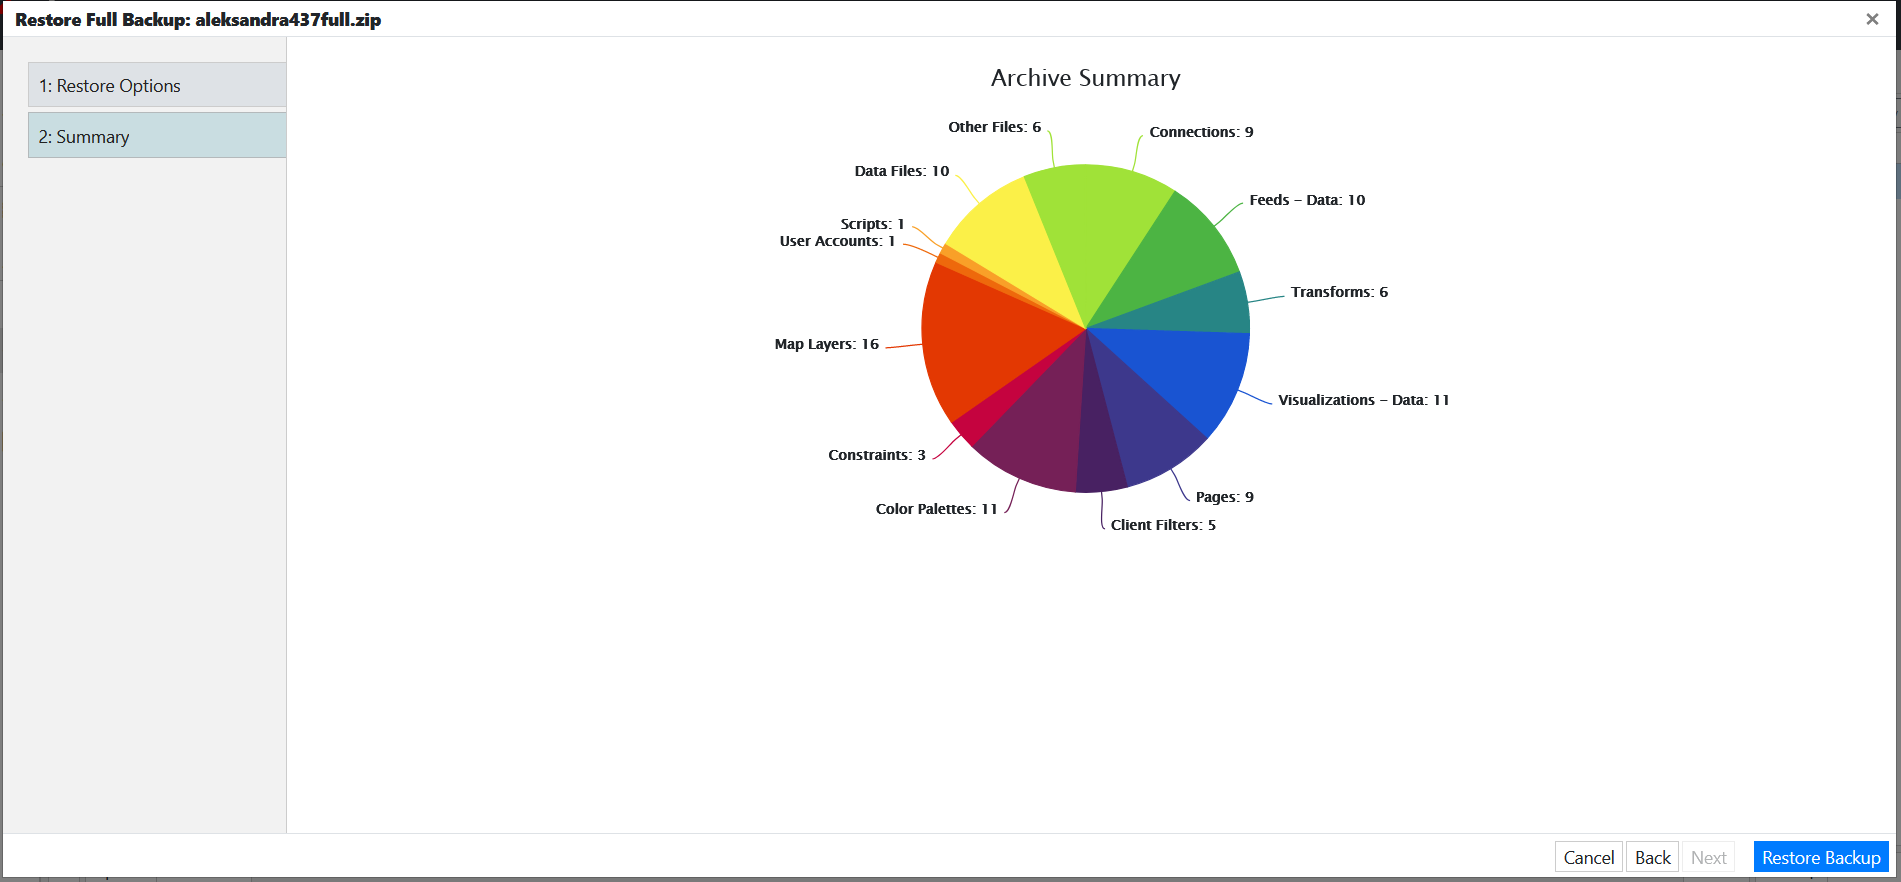
Step 2: Restore Summary
The restore summary shows a preview of the content that will be restored on the active server. This enables you to preview changes to the system prior to restoring a full backup.
As a safety measure, the system will automatically perform a full backup prior to a restore. These recovery backups can be used to revert the system’s configuration state to that prior to performing the restore. They are available through the Recovery tab in the Backup & Restore UI. Refer to Backup and Restore for more information.
Step 3: Restore Backup
As a final step, click the Restore Backup button in the bottom right corner. A Restore in Progress pop-up is displayed. Once done, a confirmation message is displayed, and you will need to refresh the client.
Permission to Create and Restore Full Backups
edgeCore version: 4.3.6
As explained on the Overview page, in order for users to be able to create and restore full backups, you need to assign security permissions to them.
Deleting Full Backups
edgeCore version: 4.3.7
To learn how to delete full backups and what permissions you need to assign to users, refer to the Overview page.