For the purpose of this example, we have created two visualizations – ServiceNow Web Content visualization and a table visualization containing user information from an uploaded CSV. Please note that in this case you will need to have the ServiceNow web adapter installed as an extension.
This is what our uploaded CSV looks like when its data is visualized in a table:

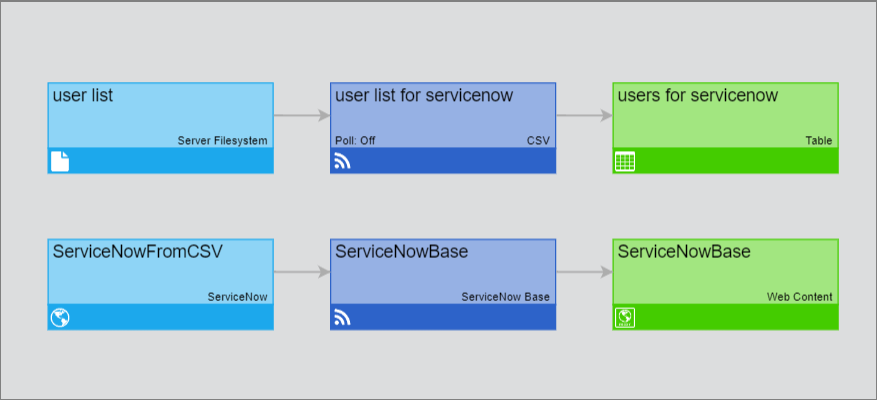
And this is what our pipeline looks like:
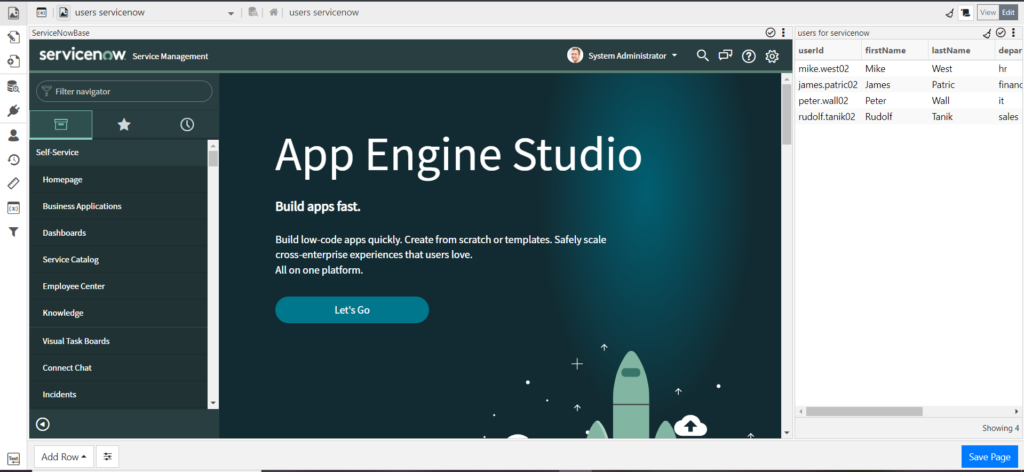
After placing these two visualizations on a page, this is the result:
We will create a script that will fill out the user creation form with the necessary information so we do not have to enter the information manually.
All the steps outlined below can also be followed in this video.
Step 1: Record Script
- On the page containing the visualizations, click Edit for the RPA Scripts button to appear.
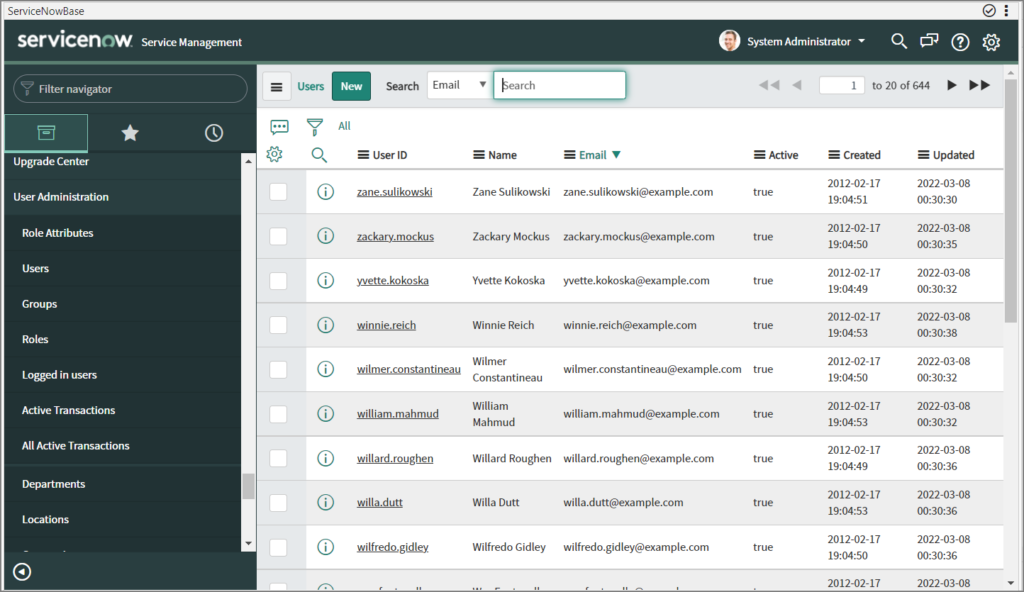
- In ServiceNow, click Users in the left-hand menu.
A list of users will be displayed, and on this page we will need to use the New button in order to add new users.
- Click RPA Scripts.
The minimized Script Center is displayed. - Click Record New Steps.
The recorder is displayed with available actions, and the record button is blinking. - Since we have a button that we need to click on to create a user, as mentioned in step 2, we need to capture this click in the script. To do that, click Capture Next Mouse Click in HTML and then click the New button in ServiceNow.
- We want the information from the table/the uploaded CSV to be filled out (copied) in the corresponding field in the form, so we will click Ctrl + V in the following fields:
– User ID
– First name
– Last name
– Department
In this particular field, after clicking Ctrl + V, we also need to use/add the Focus Element action twice because this field acts as a dropdown. Once the script is recorded, when we modify it, the first focus element will call the focus dispatch event on focusing, and the other focus element will call the blur dispatch event when the element loses focus.
– Email
– Mobile Phone
The actions are recorded and displayed in the recorder. - Since we have the button that we need to click on to finish user creation/registration, we need to capture this click in the script. To do that, click Capture Next Mouse Click in HTML and then click the Submit button in ServiceNow.
The action is recorded and displayed in the recorder. - Click Stop Recording.
- Click Save Script As New.
A pop-up is displayed. - In the pop-up, in Script Name, enter the name for your script.
Additionally, you can also provide a description. - Save your changes.
Step 2: Create Run Script Action
- In the table visualization containing user information, click the three dots in the right corner and then click Edit Actions.
A pop-up is displayed. - In the pop-up, click + and then select Click Row > Run Script.
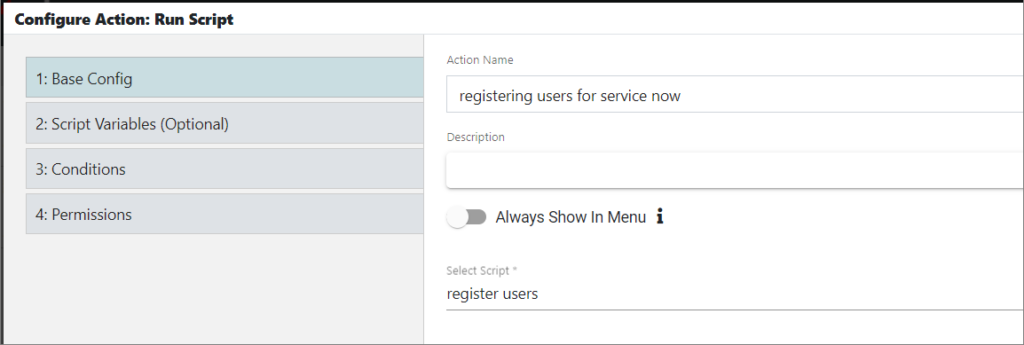
A new window for configuring the action is displayed. - In Base Config, do the following:
a) In Action Name, provide a name for the action.
b) (Optional) Provide a description.
c) (Optional) Enable or disable the Always Show in Menu toggle switch.
When the switch is enabled, the action will appear when you click on a row in the table, and then you will need to click on it to perform it. When the switch is disabled, the action will not appear but will be performed when you click on a row. - From the dropdown, select the script you have previously recorded.
- Click Next.
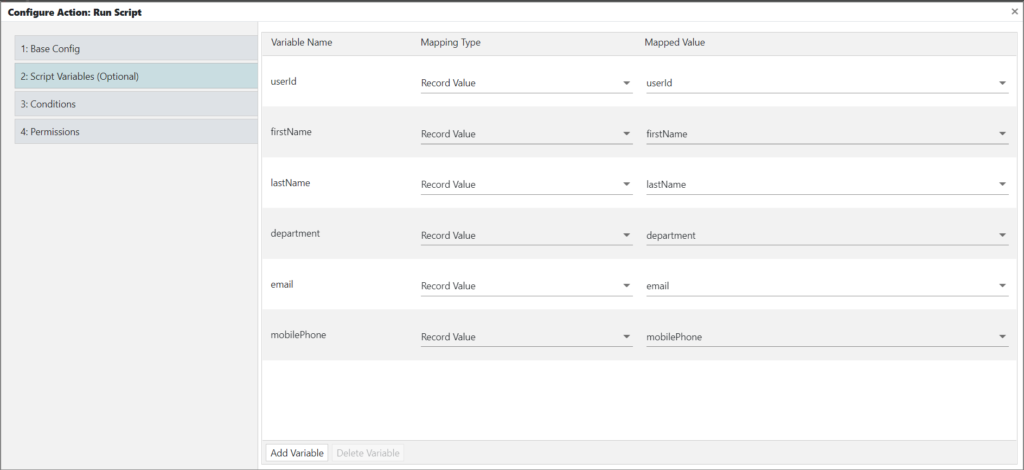
You are taken to the Script Variables tab. - In Script Variables, do the following:
a) Click Add Variable for each variable, that is, the field we have in the CSV/table;
b) In Mapping Type, select Record Value, and in Mapped Value, select a value for each variable. In our example, the variable names and mapped values are as follows:
- Click Next.
You are taken to Conditions, where you can set the conditions under which the action will be performed. We will not set any conditions for our example. Click Next to go to Permissions. Here you can exclude certain roles from accessing the action. We will allow all users to access the action. - Click Save and Close.
The action is displayed in the pop-up. Close the pop-up.
Step 3: Modify Script
In the script that was created in step 1, we want to modify the steps to get their values from the variables that have been set up in step 2.
- On the page containing the visualizations, click Edit for the RPA Scripts button to appear.
- Click RPA Scripts.
The minimized Script Center is displayed. - Click
 , load the script, and then click
  to maximize the Script Center.
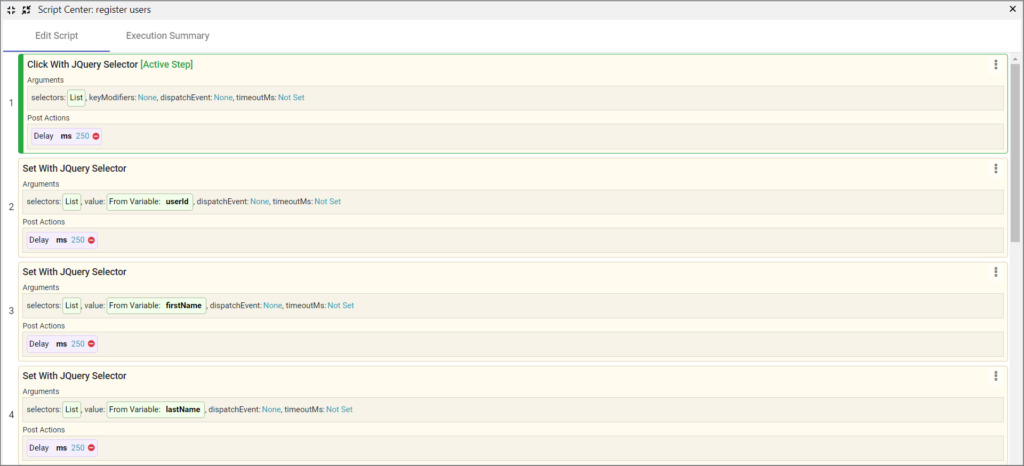
10 recorded steps are displayed. - For each of the following steps, click the field next to value and select Set to Variable Value: step 2, step 3, step 4, step 5, step 8, and step 9. The variable value for each step is the corresponding value from the step 2 above (sub-step 6).
- Set the delay in milliseconds between each step by clicking the three dots in the top-right corner and selecting Add Delay. By default, the delay is 250 ms.
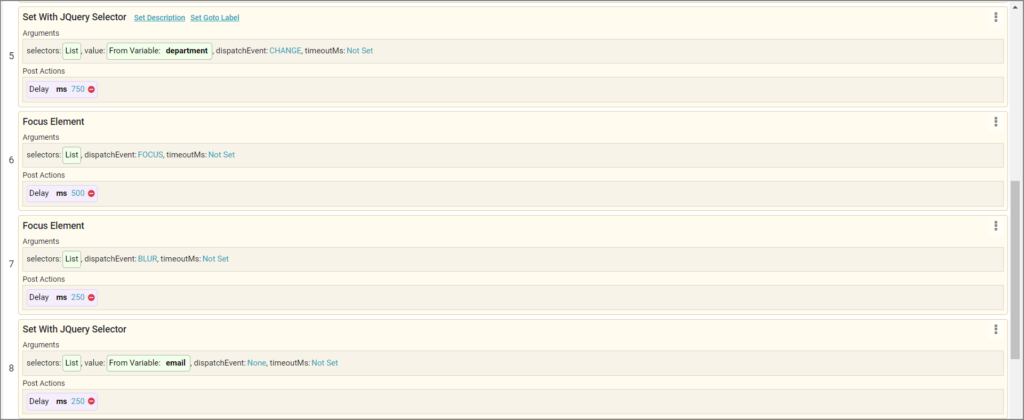
- In step 5 of the script, whose value is department, click dispatchEvent and in the pop-up, enable the CHANGE toggle as the framework expects a change to happen before the data is updated. Save your changes.
- In steps 6 and 7 of the scripts – Focus Elements, for the first focus element, set the dispatchEvent to FOCUS and the second one to BLUR.
- Click
 to save your changes.
 - Exit the Script Center.
This is what our script looks like:

Step 4: Run Script
In this step you will see your script in action.
- In the table visualization, click on any row.
The form fields in Service Now get populated with the corresponding user information from the row you clicked on.
For each user in the table, you will have to click on the corresponding row in order to run the script and create the user in question.