Maximizing/Closing windows inside Citrix
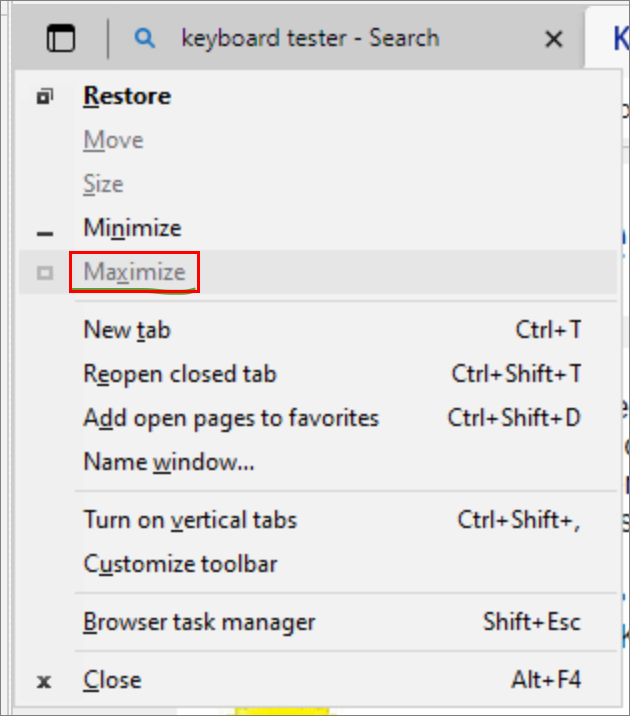
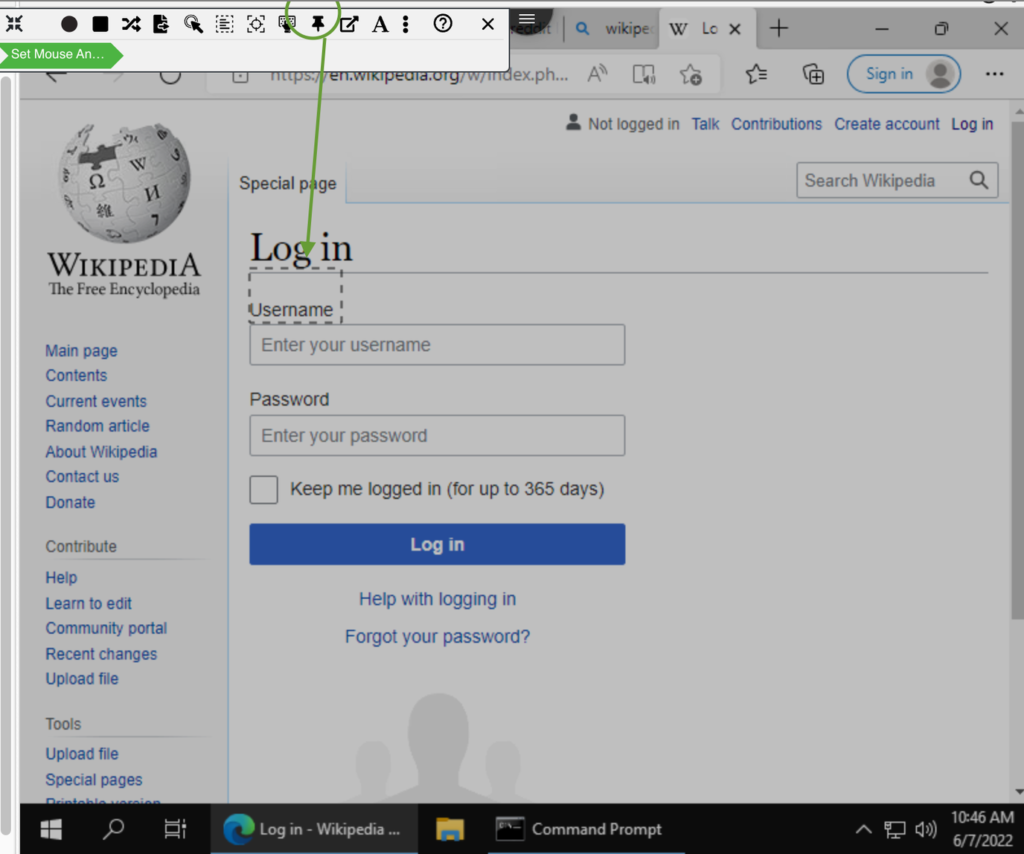
To maximize the window inside Citrix easily, we recommend using keyboard shortcuts. First, make sure the window is selected and fully loaded — you can use the anchor mouse function to wait for a certain element, like the window icon to appear on the screen.
After that, send a character ‘space’+ALT to open a window menu, and then send a character ‘X’.
As you can see, that is a shortcut to maximize the window.
Much like the X maximizes the window, you can also use other supported characters to open new tabs, minimize, or perform other actions in the window.
We recommend using ALT+F4 for closing applications too, as it does not require anchoring or mouse or clicking on the X button, which might confuse the RPA image matching if multiple windows are open.
Copying text from Citrix window
When it comes to text selection and copying text from within the Citrix window, there are multiple options available depending on the type of text and its container in Citrix.
The easiest type of text to copy is from input fields and text areas. To copy text from these fields, first, place/click your cursor within the input field, after that, send a character ‘a’ + CTRL to select all text, and then send character ‘c’+CTRL. This will copy the selected text into the Citrix clipboard. Next, to get the clipboard content into the context of the script, use a Get Remote Clipboard step and assign the result to a scriptVar.
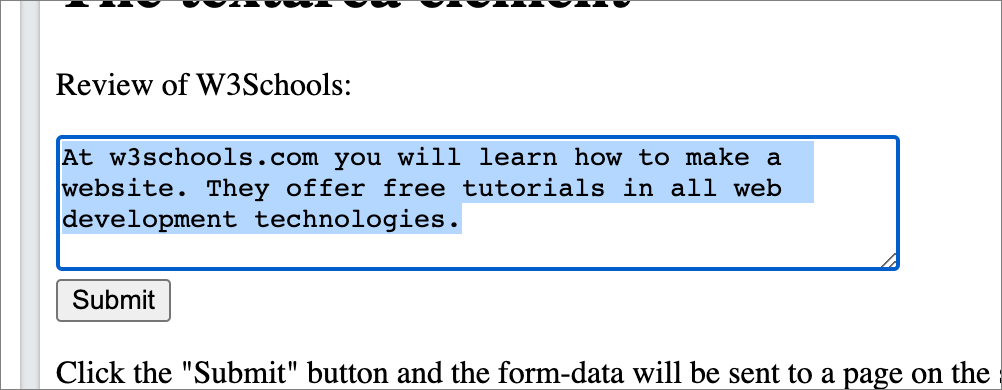
To select plain text and text containing elements other than inputs, you have 2 options. The first is to use the click-shift-click method, in which you send a click event at the beginning of the text block/paragraph, after that add a delay (300ms) and after the delay, add another click at the end of the text block with a SHIFT key modifier enabled. After that, the text should be highlighted and it can be copied to the clipboard by sending a character ‘c’+CTRL, and added to the script context by adding the Get Remote Clipboard step and assigning the result to a scriptVar.

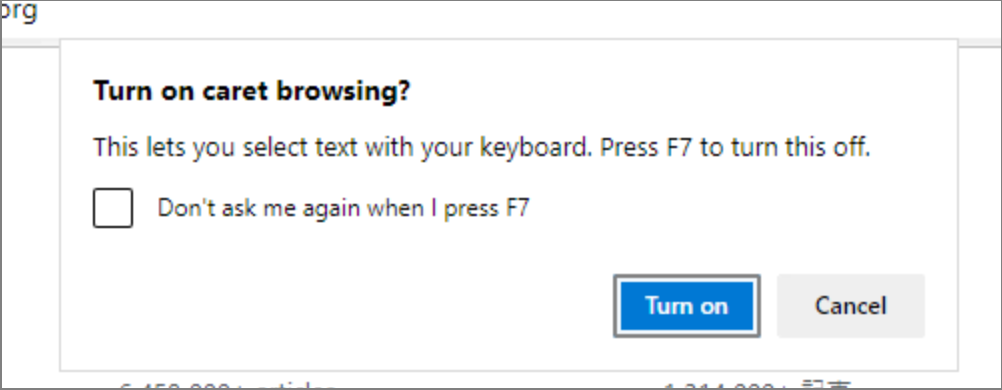
The second option is to use Caret Text Browsing (works in web browsers). To enable this feature in web browsers, send the F7 key, which will likely prompt the user to enable caret text browsing. If there is a prompt, anchor your cursor to the enable button, and click enable. After caret browsing is enabled, click at the beginning of the text bock, you will notice the text now has a cursor and can be selected just like any text in text editors. This allows you to navigate text by sending arrow keys, partially selecting text with CTRL+Arrow key, or selecting whole lines with ArrowDown+SHIFT. Once the text is highlighted it can be copied to the clipboard by sending a character ‘c’+CTRL and added to the script context by adding the Get Remote Clipboard step and assigning the result to a scriptVar.
Searching the text content within Citrix CTRL+F (Web browser and compatible apps)
Most text editors and web browsers in Windows support searching the page for text values.
To trigger the search prompt, send a character F+CTRL, and after that send Type Text with the value you are searching for. This is useful when you are trying to focus on an element that is not visible on a page by default but can be scrolled into. For example, if you want to type text into an input box at the bottom of a web page. If you search the text of that input’s label, the view will scroll into the part of the page where the label is visible, and so is the input.
How to select a link by doing search on its text
To follow a link after it has been found in search, press Esc followed by Enter.
Simulate the following, using Type Character steps:
- Ctrl+F to open the search box.
- Ctrl+G or Enter moves through all highlighted results.
- Ctrl+Shift+G or Shift+Enter reverse move through all highlighted results.
- Esc closes search box, turns off all highlights, selects the focused text/link.
- Enter to follow a link after highlights are off.
- Use Cmd instead of Ctrl on Mac.
- Another method is Control + Enter (after highlighting in search).
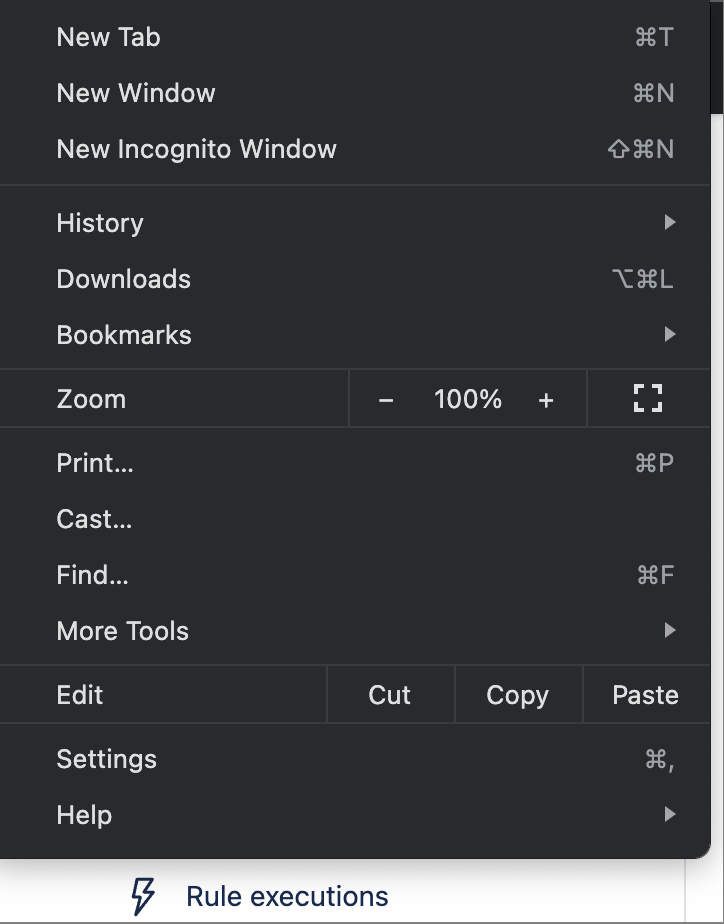
Re-setting zoom level of windows inside Citrix
In supported apps, a default zoom level of 100% can be set by sending a character/number ‘0’+CTRL.
This is important to have at the beginning of the automation, as it will prevent issues in case the agent’s zoom level is different than 100%. If the zoom level is not the same as it was when the script was recorded, the images won’t match, anchoring will not work and the script will fail.
Anchoring mouse position
When the intent is to click on some element inside Citrix, it is recommended to use the cursor anchor function and select a unique element closest to the element. Example: If the intent is to click inside an input box for the username, it’s best to anchor to the input element label Username. Beware that some elements might shift or move when screen size changes. For best results, try resizing the screen while testing to check for this behavior.
Additionally, anchoring to image can be used to wait for an element to appear on the Citrix screen.
Use script variables
In many cases, the automation of a given process will require the use of script variables. Make sure you name the scriptVars the same way when creating a Launch Script Action and when referencing the variable in certain steps. Note that the script variables update as the feed is updated, meaning that if there is no refresh time set in the data feed to the widget, the values might be outdated.
Script variables have the scope only within the script and can be accessed within any RPA script steps that support editable values.
You can select Advanced from the Edit Value dialog and select either:
Variable Value and type in the name of the scriptVar
OR
Javascript Expression and use it within your code snippet as scriptVar.nameOfTheVariable
Script variables can also be objects, arrays, or any JS-supported type.
Use JavaScript Eval
Javascript gives you a wide variety of functionality when creating custom automation. A common use case for a Javascript eval is using branching logic within the script and pointing to different RPA Script steps based on the assigned logic. This is definitely one of the most useful ways to employ a Javascript eval within your automation.
Examples:
You can use an eval to check if the Find Image step has found a certain icon (the JS Eval post action of the Find Image will return “result.found = true” if the image is found), and, based on that, either repeat the step and check again or branch to a different Script step and continue your automation workflow. You can also make it loop and set a retry counter.
You can get object values from an external file in a different widget and compare them to the values in the script clipboard. Any functionality that you can create with Javascript can be tied in as RPA Script logic.
Use scriptRunner function
You can access scriptRunner within any JS Eval. The scriptRunner object allows you to jump (GOTO) to any script step, loop, combine with logic operators and much more.
“scriptRunner.nextStep = #”
Example:
if (result.found)
{
scriptRunner.nextStep = scriptVar.foundStep
}
else if (scriptVar.loopCount > scriptVar.maxLoopCount)
{
throw “Image not found”
}
scriptVar.loopCount++;
Split long tasks into multiple short scripts
When possible, try to avoid making excessively long scripts. When a script is played back, no manual actions are allowed on the page, so having multiple shorter scripts will allow you to make changes, enter data, and otherwise interfere in case any errors occur. Scripts are intended to be launched on edgeCore Actions.
For example, if you have a visualization that shows a list of computers and their status, you can create an action that, based on the online status, will either launch a script that will connect to the computer or a different script that will try to get the computer online.
You can set any number of actions and rules to click events. When multiple actions are attached to the same visualization, a drop-down dialog will list all the options when a hover or click is performed.
Use action delay
Adding a delay might be necessary for some tasks. Typically, using the Anchor image step to wait for a page to load is the best option, but in case you cannot reliably anchor an image, you can set a hardcoded delay until the next step. One useful example is adding a delay that will wait for the element animation to end on the page before proceeding to the next step.
Use keyboard commands
Keyboard events are typically more reliable than click events during script playback. The main reason is precision and repeatability. Sometimes, when creating automation for a webpage, dynamic elements like ads will change the dimensions of the page, and doing so will change the targeted elements’ alignment and position. In that case, mouse clicks have the potential to fail if the element has changed in relative position to the image anchor. By using keyboard commands, like tab, arrows, page up/down, home, etc. actions will be executed the same way every time. We recommend using Tab to switch input fields and Enter to submit instead of using mouse clicks. Secondly, while you can use many keyboard shortcuts in the Citrix widget, some of them will get intercepted locally by your browser. In that case, you can manually edit the script and add the keyboard shortcut as a “type character” action.
Clean up after yourself
When finishing automation, it is a very good practice to end the script with the screen looking the same as it did when you started recording it. For example, if the script is opening Google Chrome, the script should open a New Tab, perform script actions, and end by closing the tab. The same thing applies when using multiple apps in automation. If a Chrome window is in front and in focus and the script opens a new app, the script should end by closing the app and leaving Chrome in front and focused. The main reason for this practice is repeatability. You want to make sure the script will start and end the same way every time it’s run and that it does not pile up the Citrix VM with multiple open windows and tabs from previous script executions. It is also good to make sure the apps are left in the maximized state if possible.
Auto-hide the task bar in Citrix
To have more screen space needed for the automation script to run, Right-click on the Citrix taskbar and select Auto hide. To switch between apps, use the tab key with left-alt as a modifier.
The Script Recorder does not capture clicks on the task bar even when it is visible.
Make your recorded scripts re-usable
If you want to run the recorded script on multiple pages, you will have to replace the unique visID from each recorded step with single within the Edit Script Source dialog.
This feature is useful in cases where the same tasks need to be automated on multiple pages or when making a duplicate script with small changes to adapt to a different page.
If you try running the recording without doing this, you will encounter the error:
Failed to find registered ICA client with ID:
NOTE: If your original page contains more than one Citrix widget, you will not be able to run a script with visID set to single. In that case, it’s better to perform a partial backup of the eS environment and load it to the target server.
Visualization stacking
A single page can show only as much as you can fit on a screen, so, to combat that issue, there is a feature called visualization stacking.
When configuring the look and feel of the widget frame and headers, we recommend removing headers when not necessary to save screen space.
Actions
Actions are a key component when triggering a script or any function on the page.
You can assign multiple different click actions to almost any type of visualization. Keep in mind that you can also have multiple visualizations in a single widget, giving you the ability to bind many actions within a single page.
If you have multiple click events assigned, you will get a drop-down list of actions when clicked. Additionally, you can narrow down the actions for a click event using the Conditions tab in the action settings dialog.
Example: IF clicked row property “ACTIVE” is TRUE => Run script, ELSE do not.
Tutorial videos
You can download our tutorial videos on this page.