Microsoft Entra ID SAML (formerly Azure Active Directory)
Article Contents
- Download edge-saml-artifacts-v14.zip into /tmp
- Change into edgeCoreHome directory.
- Run unzip /tmp/edge-saml-artifacts-v14.zip
- Restart edgeCore.
- Go to https://entra.microsoft.com/
- Go to Applications, then expand it and go to App registrations.
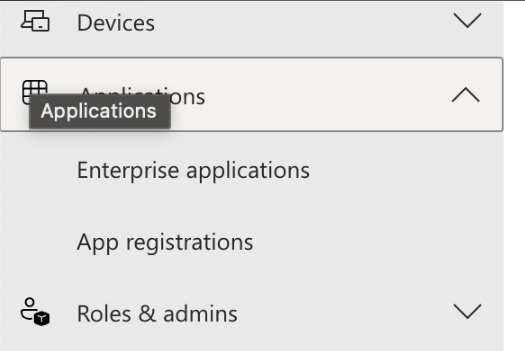
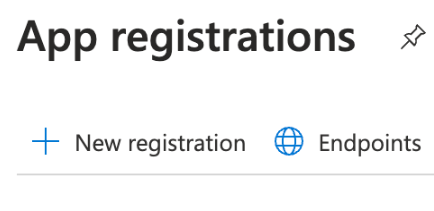
- Click New registration.
- Provide a name for the application.
- You can leave the default values for Supported account types.
- Change Redirect URI to Web and enter the public base URL (must be the exact URL entered for saml.spAssertionConsumerService).
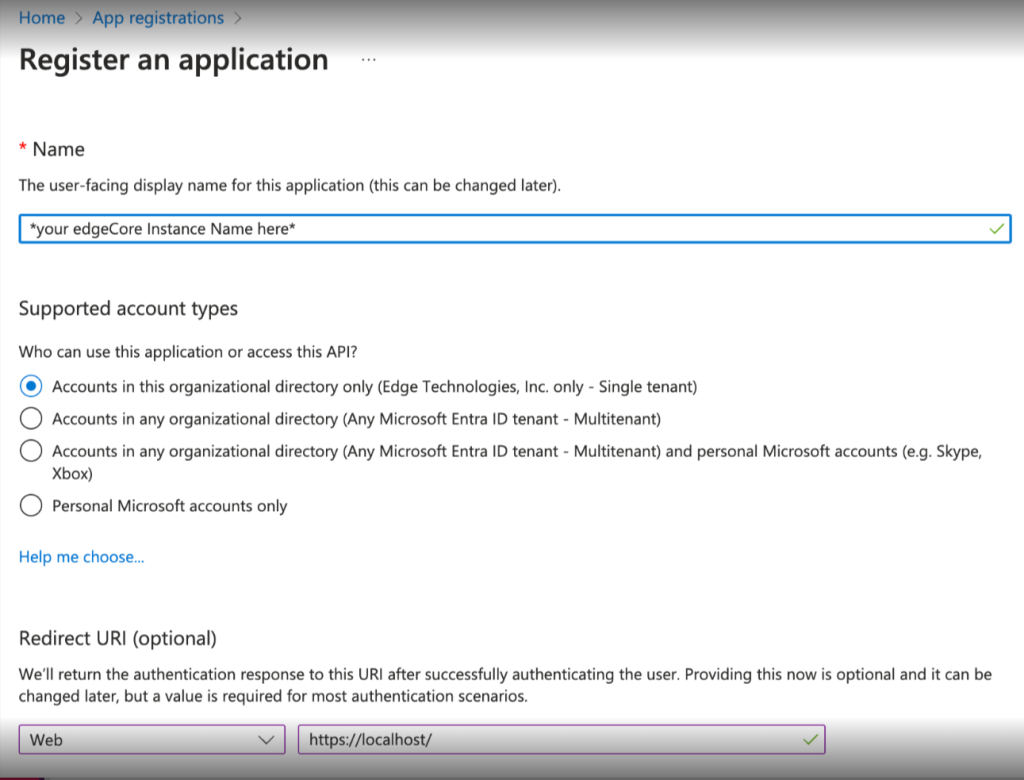
- Click Register.
- Click Endpoints at the top of the page.
- Copy the Federation Metadata Document link value.
- Open a new tab and paste in the copied value. View the metadata document.
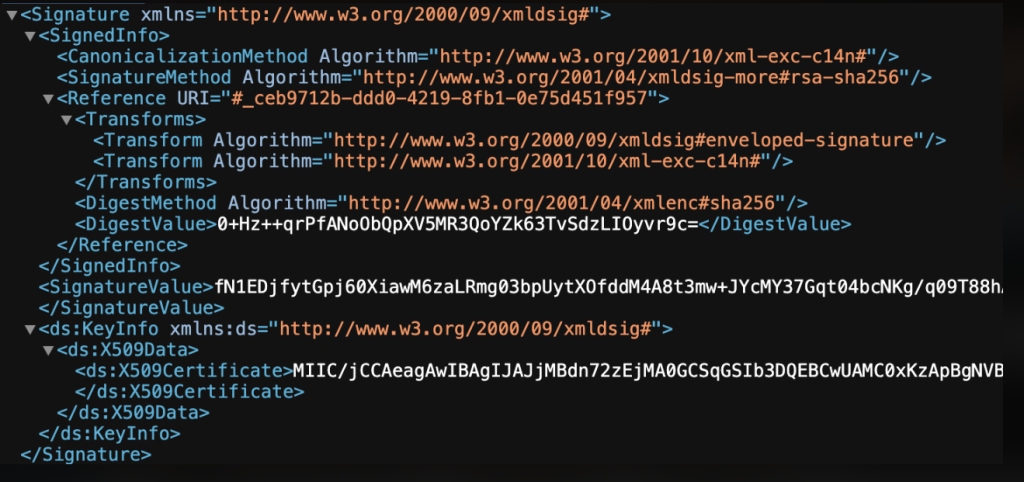
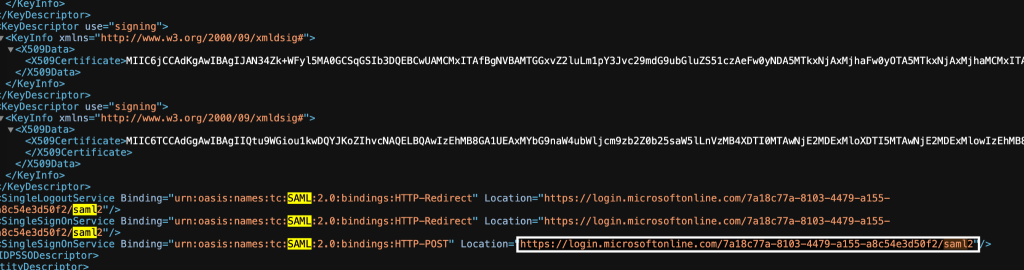
- Copy the <ds:X509Certificate> value out.
- Return to the edgeCore Server command line.
- Create a new file: /tmp/entra-id.crt
- On the first line of the file, insert —–BEGIN CERTIFICATE—–
- Paste the x509 certificate value.
- Hit Enter and type —–END CERTIFICATE—–
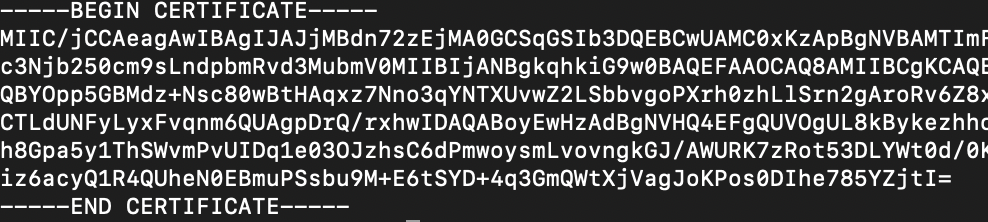
- Save and close the file.
- Run keytool -keystore conf/edgesp.jks -storepass your-super-secret-password -importcert -alias entra-id -noprompt -file /tmp/entra-id.crt
- Run vi conf/local.properties
- Add line to the end of the file with vi keystrokes: G o <esc>
- Append saml properties with vi keystrokes: :r conf/local.properties-template <enter>
- Make the following changes:
saml.keystorePath=${prod.home}/conf/edgesp.jks
saml.keystorePass=your-super-secret-password
saml.idpCertAlias=entra-id
- Go to the bottom of the Federation Metadata Document and copy the SingleSignOnService Location value that has HTTP-POST bindings.
- Find the line containing saml.idpSsoService= and change the value to the Location value (which should be in your paste buffer).
- Edit the line containing saml.spAssertionConsumerService to be saml.spAssertionConsumerService=<edgeCore Public Facing URL>
- Copy the value for entityID from the Federation Metadata Document. This value is located in the first line.
- Go back to local.properties and paste it in as the value for saml.idpEntityId
- Go back to the first Entra tab, close the endpoints dialog, and copy the Application (client) ID.
- Go back to local.properties and paste that as the value for saml.spEntityId.
- Save and close local.properties (vi keystrokes <esc> :wq <enter>)
- Ensure you are logged out of edgeCore and then restart edgeCore.
- Open new browser tab and enter <edgeCore Public Facing URL>.
- Login customization in conf/local.properties:
a) Uncomment #saml.loginMode=saml to have a saml-only login (no login form)
b) If loginMode is saml, you can enable a URL-based parameter to get the login form by uncommenting #saml.enableNosaml=true
c) Go to <edgeCore Public Facing URL>/login?nosaml
d) Restart the server for login.properties change to take effect.
- Change into edgeCoreHome directory.
- Run keytool -keystore conf/edgesp.jks -storepass your-super-secret-password -keypass your-super-secret-password -genkey -keyalg RSA -alias edgesp -validity 1095 -keysize 2048 -dname cn=edgeCore,ou=Unknown,o=Unknown,c=Unknown
- Run keytool -keystore conf/edgesp.jks -storepass your-super-secret-password -export -rfc -alias edgesp -file /tmp/edgesp.crt
- Edit conf/local.properties.
- Change saml.spCertPass to your-super-secret-password
- Restart edgeCore.
- Go to https://entra.microsoft.com/
- Under App registrations > All Applications, select your edgeCore installation.
- Select Certificates & Secrets.
- Select Certificates tab.
- Upload /tmp/edgesp.crt
- Click add
(description is optional)
- AuthNRequest from edgeCore are now signed.
- Download edge-saml-artifacts-v14.zip
- Unzip edge-saml-artifacts-v14.zip in your edgeCore home directory.
- Restart edgeCore.
- Go to https://entra.microsoft.com/
- Go to Applications, then expand it and go to App registrations.
- Click New registration.
- Provide a name for the application.
- You can leave the default values for Supported account types.
- Change Redirect URI to Web and enter the public base URL. An example of a localhost URI might be http://localhost:8080/;
This URI value will later be used for the saml.spAssertionConsumerService value.
- Click Register.
- Click Endpoints at the top of the page.
- Copy the Federation Metadata Document link value.
- Open a new tab and paste in the copied value. View the metadata document.
- Copy the <ds:X509Certificate> value out.
- Create a text file located in the edgeCore home directory.
- On the first line of the file, insert —–BEGIN CERTIFICATE—–
- Hit Enter for a new row and paste the x509 certificate value.
- Hit Enter again for a new row and insert —–END CERTIFICATE—–
- Save the file as entra-id.crt
- For the next step, you will need to have Java keytool as an option in your Command Prompt. To enable/check it:
– Run the Command Prompt as administrator and enter keytool from command prompt: C:\Windows\System32>keytool
– If the Command Prompt returns the following, you are setup correctly and you should skip to step 26.
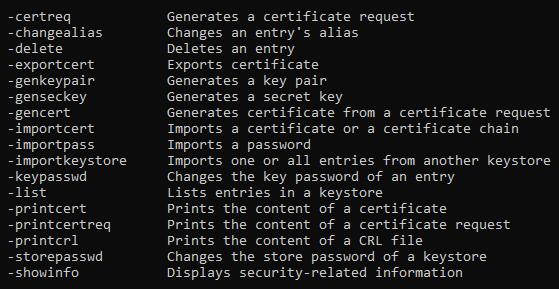
– If the Command Prompt does not return the above result, proceed with steps 21-25.
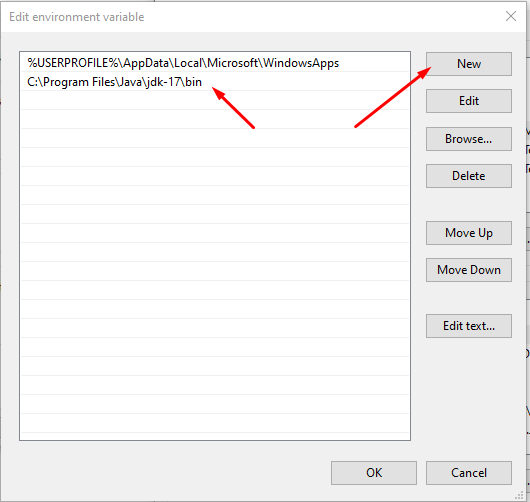
- Locate the bin folder of the Java you are using to run edgeCore.
- The path should look like this : C:\Program Files\Java\jdk-17\bin
Copy that path as you will need it in the next steps.
- Open Environmental Variables and double-click on Path under the user you are using.
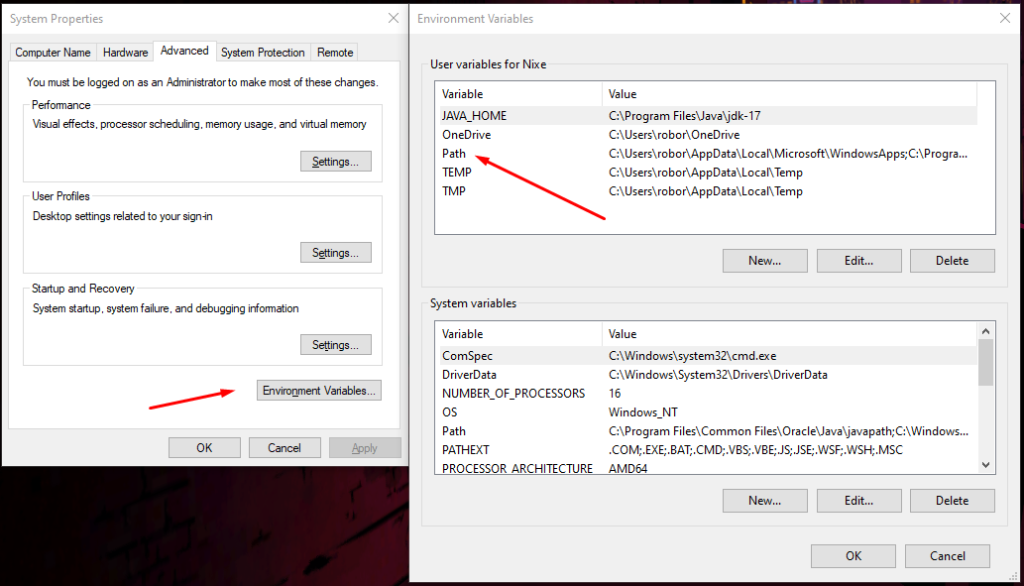
- Add the path copied before.
- Click OK on all windows and run your Command Prompt as administrator and check if the keytool function works.
- Now cd into your edgeCore home directory in your terminal.
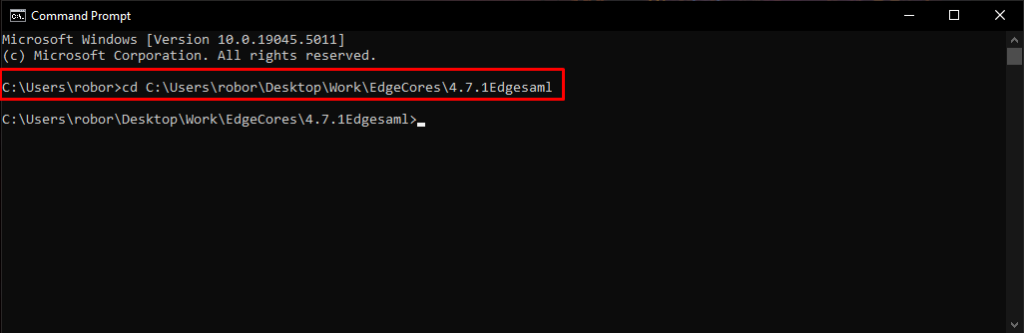
- Run keytool -keystore conf/edgesp.jks -storepass your-super-secret-password -importcert -alias entra-id -noprompt -file C:\Users\YourUser\Path\EdgeCores\4.7.1Edgesaml\entra-id.crt
Make sure to change the variables for the location of your files and edge directory. Note that the super-secret-password is being created by you here, and is not an already existing password. edgesp.jks is also created here, and does not exist already.
- Open the conf folder in the edgeCore home directory and then open local.properties-template.
Copy everything in that file.
- Open local.properties and paste everything copied on the line after the last in the file.
- Make the following changes:
saml.keystorePath=${prod.home}/conf/edgesp.jks
saml.keystorePass=your-super-secret-password
saml.idpCertAlias=entra-id
- Go to the bottom of the Federation Metadata Document and copy the SingleSignOnService Location value that has HTTP-POST bindings.
- In your local.properties, find the line containing saml.idpSsoService= and change the value to the Location value (which should be in your paste buffer).
- Edit the line containing saml.spAssertionConsumerService to be saml.spAssertionConsumerService=<edgeCore Public Facing URL>
- Copy the value for entityID from the Federation Metadata Document. This value is located in the first line.
- Go back to local.properties and paste it in as the value for saml.idpEntityId
- Go back to the first Entra tab, close the endpoints dialog, and copy the Application (client) ID.
- Go back to local.properties and paste that as the value for saml.spEntityId.
- Save and close.
- Ensure you are logged out of edgeCore and then restart edgeCore.
- Open new browser tab and enter <edgeCore Public Facing URL>.
- Login customization in conf/local.properties:
a) Uncomment #saml.loginMode=saml to have a saml-only login (no login form)
b) If loginMode is saml, you can enable a URL-based parameter to get the login form by uncommenting #saml.enableNosaml=true
c) Go to <edgeCore Public Facing URL>/login?nosaml
d) Restart the server for login.properties change to take effect.
- Open Terminal while in the edgeCore Home Directory.
- Run keytool -keystore conf/edgesp.jks -storepass your-super-secret-password -keypass your-super-secret-password -genkey -keyalg RSA -alias edgesp -validity 1095 -keysize 2048 -dname cn=edgeCore,ou=Unknown,o=Unknown,c=Unknown
- Run keytool -keystore conf/edgesp.jks -storepass your-super-secret-password -export -rfc -alias edgesp -file /EdgeDirectory/edgesp.crt
- Edit conf/local.properties.
- Change saml.spCertPass to your-super-secret-password
- Restart edgeCore.
- Go to https://entra.microsoft.com/
- Under App registrations > All Applications, select your edgeCore installation.
- Select Certificates & Secrets.
- Select Certificates tab.
- Upload /tmp/edgesp.crt
- Click add
(description is optional)
- AuthNRequest from edgeCore are now signed.
- Download edge-saml-artifacts-v13.zip into /tmp
- Change into edgeCoreHome directory.
- Run unzip /tmp/edge-saml-artifacts-v13.zip
- Restart edgeCore.
- Go to https://entra.microsoft.com/
- Go to Applications, then expand it and go to App registrations.
- Click New registration.
- Provide a name for the application.
- You can leave the default values for Supported account types.
- Change Redirect URI to Web and enter the public base URL (must be the exact URL entered for saml.spAssertionConsumerService).
- Click Register.
- Click Endpoints at the top of the page.
- Copy the Federation Metadata Document link value.
- Open a new tab and paste in the copied value. View the metadata document.
- Copy the <ds:X509Certificate> value out.
- Return to the edgeCore Server command line.
- Create a new file: /tmp/entra-id.crt
- On the first line of the file, insert —–BEGIN CERTIFICATE—–
- Paste the x509 certificate value.
- Hit enter and type —–END CERTIFICATE—–
- Save and close the file.
- Run keytool -keystore conf/edgesp.jks -storepass your-super-secret-password -importcert -alias entra-id -noprompt -file /tmp/entra-id.crt
- Run vi conf/local.properties
- Add line to the end of the file with vi keystrokes: G o <esc>
- Append saml properties with vi keystrokes: :r conf/local.properties-template <enter>
- Make the following changes:
saml.userAttr=http://schemas.xmlsoap.org/ws/2005/05/identity/claims/name
saml.keystorePath=${prod.home}/conf/edgesp.jks
saml.keystorePass=your-super-secret-password
saml.idpCertAlias=entra-id
- Go to the bottom of the Federation Metadata Document and copy the SingleSignOnService Location value that has HTTP-POST bindings.
- Find the line containing saml.idpSsoService= and change the value to the Location value (which should be in your paste buffer).
- Edit line containing saml.spAssertionConsumerService to be saml.spAssertionConsumerService=<edgeCore Public Facing URL>
- Copy the value for entityID from the Federation Metadata Document. This value is located in the first line.
- Go back to local.properties and paste it in as the value for saml.idpEntityId
- Go back to the first Entra tab, close the endpoints dialog, and copy the Application (client) ID.
- Go back to local.properties and paste that as the value for saml.spEntityId.
- Save and close local.properties (vi keystrokes <esc> :wq <enter>)
- Ensure you are logged out of edgeCore and then restart edgeCore.
- Open new browser tab and enter <edgeCore Public Facing URL>.
- URL to log in without SAML authentication:
- <edgeCore Public Facing URL>/login?nosaml
- you can disable this feature by editing jsp/login.edgejsp
- Change into edgeCoreHome directory.
- Run keytool -keystore conf/edgesp.jks -storepass your-super-secret-password -keypass your-super-secret-password -genkey -keyalg RSA -alias edgesp -validity 1095 -keysize 2048 -dname cn=edgeCore,ou=Unknown,o=Unknown,c=Unknown
- Run keytool -keystore conf/edgesp.jks -storepass your-super-secret-password -export -rfc -alias edgesp -file /tmp/edgesp.crt
- Edit conf/local.properties.
- Change saml.spCertPass to your-super-secret-password
- Go to https://entra.microsoft.com/
- Restart edgeCore.
- Under App registrations > All Applications, select your edgeCore installation.
- Select Certificates & Secrets.
- Select Certificates tab.
- Upload /tmp/edgesp.crt
- Click add
(description is optional)
- AuthNRequest from edgeCore are now signed.
- Download edge-saml-v9.zip into /tmp
- Change into edgeCoreHome directory.
- Run unzip /tmp/edge-saml-v9.zip
- Restart edgeCore.
- Go to https://entra.microsoft.com/
- Go to Applications, then expand it and go to App registrations.
- Click New registration.
- Provide a name for the application.
- You can leave the default values for Supported account types.
- Change Redirect URI to Web and enter the public base URL (must be the exact URL entered for saml.spAssertionConsumerService).
- Click Register.
- Click Endpoints at the top of the page.
- Copy the Federation Metadata Document link value.
- Open a new tab and paste in the copied value. View the metadata document.
- Copy the <ds:X509Certificate> value out.
- Return to the edgeCore Server command line.
- Create a new file: /tmp/entra-id.crt
- On the first line of the file, insert —–BEGIN CERTIFICATE—–
- Paste the x509 certificate value.
- Hit enter and type —–END CERTIFICATE—–
- Save and close the file.
- Run keytool -keystore conf/edgesp.jks -storepass your-super-secret-password -importcert -alias entra-id -noprompt -file /tmp/entra-id.crt
- Run vi conf/local.properties
- Add line to end of file with vi keystrokes: G o <esc>
- Append saml properties with vi keystrokes: :r conf/local.properties-samlPropsToSet
- Make the following changes
saml.userAttr=http://schemas.xmlsoap.org/ws/2005/05/identity/claims/name
saml.keystorePath=${prod.home}/conf/edgesp.jks
saml.keystorePass=your-super-secret-password
saml.idpCertAlias=entra-id
- From the Federation Metadata Document, copy the SAML-P sign-on endpoint
- Find the line containing saml.idpSsoService= and change the value to the SAML-P sign-on endpoint value (which should be in your paste buffer)
- Edit line containing saml.spAssertionConsumerService to be saml.spAssertionConsumerService=<edgeCore Public Facing URL>
- Copy the value for entityID from the Federation Metadata Document. This value is located in the first line.
- Return back to local.properties and paste it in as the value for saml.idpEntityId
- Return back to the first Entra tab, close the endpoints dialog, and copy the Object ID.
- Return back to local.properties and paste that as the value for saml.spEntityId.
- Save and close local.properties (vi keystrokes <esc> :wq)
- Run vi scripts/customAuth
- Remove if (attrSet.getKey() === “Role”) {
Replace with two lines:
var attrName = attrSet.getKey();
if (attrName === “Role”) {
- Save and close customAuth.
- Ensure you are logged out of edgeCore and then restart edgeCore.
- Open new browser tab and enter <edgeCore Public Facing URL>.
- URL to login without SAML authentication:
- <edgeCore Public Facing URL>/login?nosaml
- you can disable this feature by editing jsp/login.edgejsp
- Change into edgeCoreHome directory.
- Run keytool -keystore conf/edgesp.jks -storepass your-super-secret-password -keypass your-super-secret-password -genkey -keyalg RSA -alias edgesp -validity 1095 -keysize 2048 -dname cn=edgeCore,ou=Unknown,o=Unknown,c=Unknown
- Run keytool -keystore conf/edgesp.jks -storepass your-super-secret-password -export -rfc -alias edgesp -file /tmp/edgesp.crt
- Edit conf/local.properties.
- Change saml.spCertPass to your-super-secret-password
- Go to https://entra.microsoft.com/
- Under App registrations > All Applications, select your edgeCore installation.
- Select Certificates & Secrets.
- Select Certificates tab.
- Upload /tmp/edgesp.crt
- Click add
(description is optional)
- AuthNRequest from edgeCore are now signed.