Backup and Restore Overview
There are three different concepts exposed in the user interface when backing up a system:
- Full Backup
A full backup saves all configuration and assets for a system at a specific point in time. Restoring a full backup will return the system to the state it was in when the full backup was created. - Partial Backup
A partial backup saves only the relevant configuration for a selected page. This allows pieces of a system (content) to be shared between different servers. - Recovery Backup
A Recovery Backup is a full backup that is automatically created prior to performing any restore operation or installation of a module. It is good practice to periodically create a full backup to prevent the loss of work. Recovery backups are automatically created to ensure changes to a system are not unintentionally lost due to restore operations.
Purpose of a Backup
Backups are used in a number of different scenarios:
- They provide a mechanism to migrate configuration from one environment to another. For example, migration from development to staging, to production.
- They are used when upgrading Edge to a newer version.
- They can provide a stable instance that can be restored in the event that the system gets in a bad state.
- They provide a way for Edge Support to investigate and troubleshoot support issues. The Edge Support Team may request a backup archive when isolating a problem.
Accessing Backup & Restore Page
You can access the Backup & Restore page in two ways:
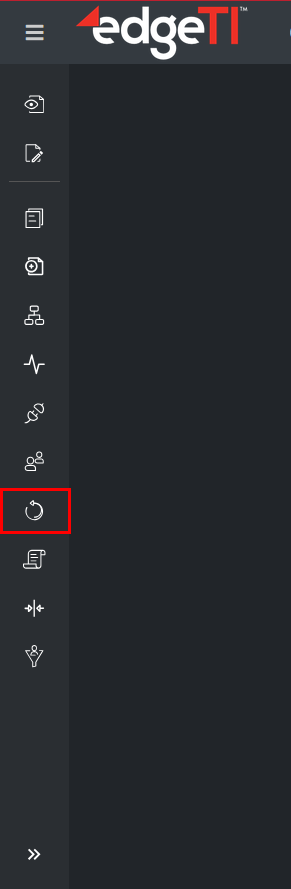
- from the Admin menu on the left side
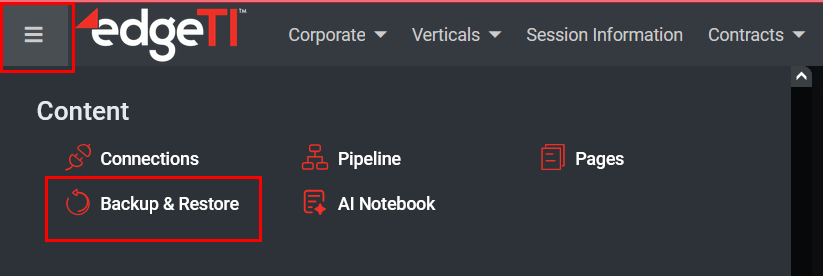
- from the System menu in the upper-left corner (hamburger menu > Content > Backup & Restore)
Backup & Restore Interface
The Backup & Restore interface separates out manually created full and partial backups from recovery backups that are automatically created. Users can switch between the two different groups of backups with a yellow underline:
- Backups – Shows all manually created full and partial backups.
- Recovery – Shows all automatically created backups. Recovery backups are full backups created prior to restore operation.

The list of backups appears in a table with the following information (as seen above):
- Name
The name that was given to this backup. Some backup names are automatically generated, which includes the date and time the backup was created to make it unique. This name is also used for the name of the backup file edgeCore creates on the file system, so it must only contain characters valid for a filename. - Type
The type of backup file for this backup (either full or partial).
– Full: All configuration and assets for a system at a specific point in time. On the server file system, full backups are named with a .zip extension;
– Partial: Only relevant configuration required for selected pages. On the server file system, partial backups are named with a .esb extension; - Description
This column contains additional descriptive information. It is particularly useful when working with recovery backups because the system will provide information about why the recovery file was created. - Date Created
The date and time a backup was created. - Version
The version of edgeCore used to create the backup archive. - Size
The size of the archive. Both Backups and Recovery tabs can be sorted by size. Moreover, when the Recovery directory becomes larger than 5GB, a message will be displayed to notify the admin.
File Location
Backup files are saved to the edgeCore server’s file system.
- Backups:
Manually created full and partial backups are located here:[Install_Home]/exports/ - Recovery:
Automatically created recovery files are located here:[Install_Home]/exports/recovery
Creating a Backup
To create a backup:
- Click + Create Backup.
A pop-up for configuring a backup is displayed.
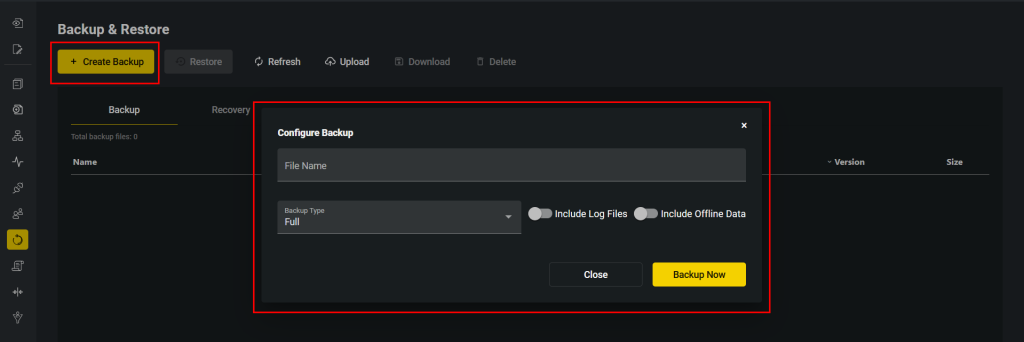
- In the pop-up, do the following:
a) In File Name, specify a name for the backup.
If you leave the name blank, the system will include the date and time in the backup name for reference.
b) In Backup Type, select the type of backup you want:
– Full: Saves everything in the system. Restoring a full backup will restore the system to that point in time.
– Partial Backup: Saves all the associated configuration and assets for selected pages. This is a good way to share content across systems.
c) Enable or disable the Include Log Files toggle switch to specify whether log files should be included with the archive.
This option is mainly used when working with Edge Support.
d) Enable or disable the Include Offline Data toggle switch to specify whether offline data should be included with the archive. - Click Backup Now.
The archive is created, and a dialog appears showing a summary of its contents. The summary enables you to validate the contents of a backup. The same preview will appear prior to restoring a backup.
Additionally, clicking on the pie chart will show a list of the individual files for the selected category.
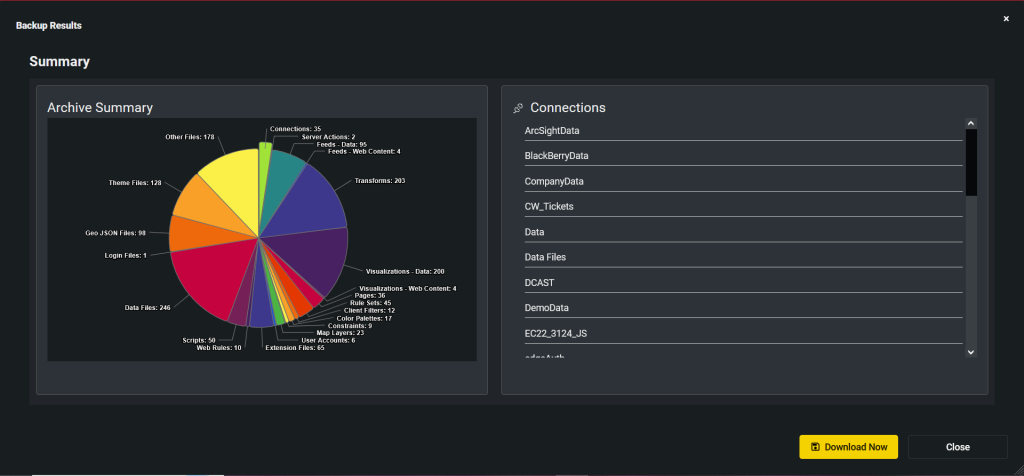
- Click Download Now to download the archive.
- Close the window.
Uploading an Archive
To move an archive from your local system up to the edgeCore server:
- Click Upload.
A pop-up is displayed, where you can upload a single archive file or multiple files.
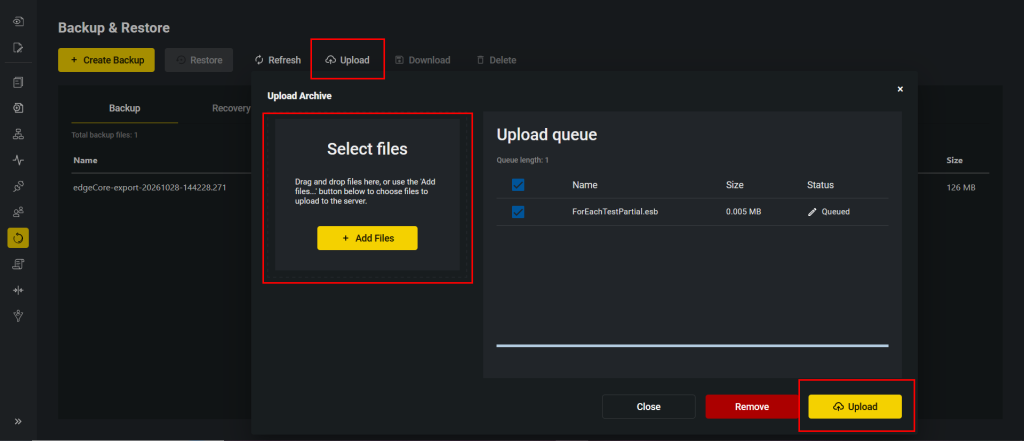
- Click + Add Files to choose files to upload to the server.
- Once the file(s) is displayed in the queue on the right, click Upload.
The status of the file is changed to Uploaded. - Close the pop-up.
The uploaded file is displayed on the Backup & Restore page. - Click on the uploaded file.
All the buttons at the top are now active.
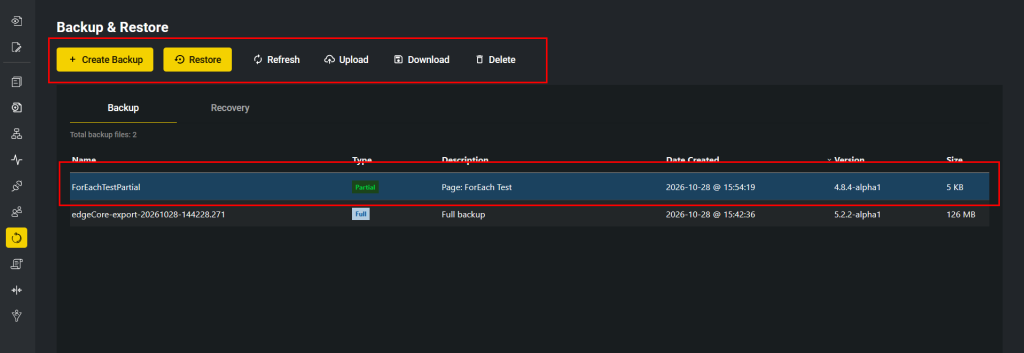
In this case, we have uploaded a partial backup, as can be seen in Type. As for the future action, we can choose whether to restore the archive, download or delete it.
Restoring an Archive
This option becomes available after selecting an item in the table. The User Interface will vary based on the type of archive being restored. See the following sections for additional information:
Downloading an Archive
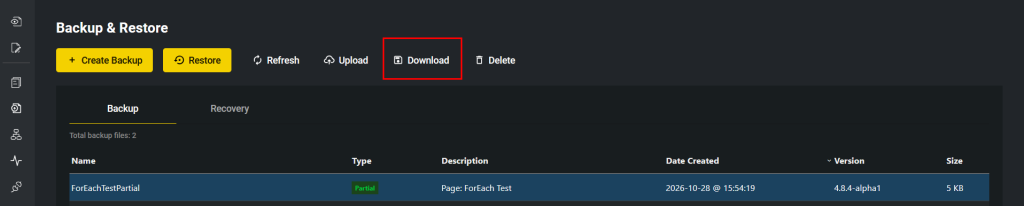
To move an archive from the edgeCore server to your local system, click the Download button.
Backup and Restore Security Permissions
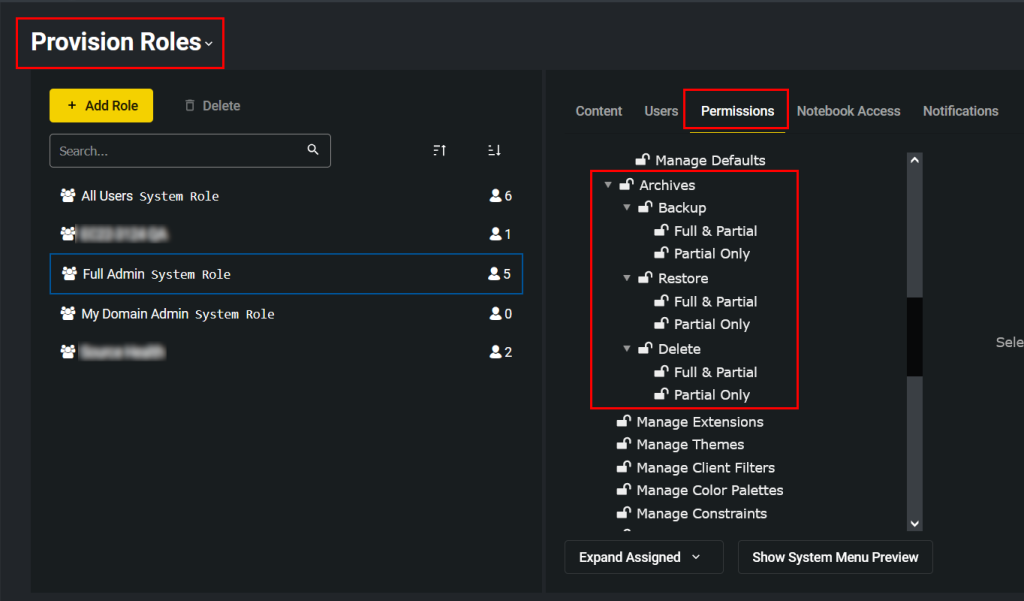
You need to assign security permissions (Provision Roles > Permissions) to a user in order for the user to be able to:
– create both full & partial backups
– create only partial backups
– restore both full & partial backups
– restore only partial backups
– delete both full & partial backups
– delete only partial backups
Deleting Backups
To delete backups and recovery, select the archive you want to delete and then click the Delete button.
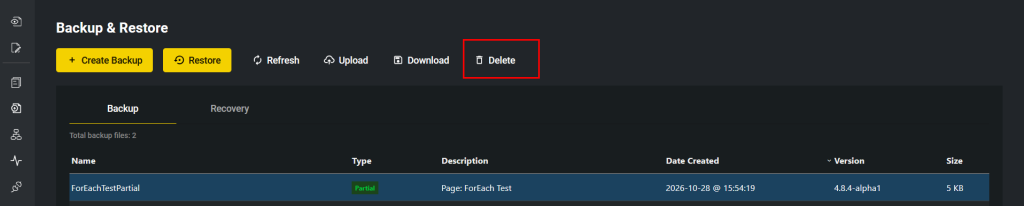
As seen above, you need to assign security permissions to a user in order for the user to be able to delete archives.
Additionally, you can delete multiple archives at once without having to delete each archive individually.
To select multiple archives, hold Shift or Ctrl keys and click on the archives you want to delete.