Some adapters may include content bundles to provide out-of-the-box pipeline configuration and pages to get up and running fast. Note that there could be multiple content bundles if needed to support different versions of an application, or simply to break up content into different groupings.
When installing or upgrading an adapter, the Deploy Content Bundle button will be active if content bundles are available. Otherwise, to deploy a bundle after installation:
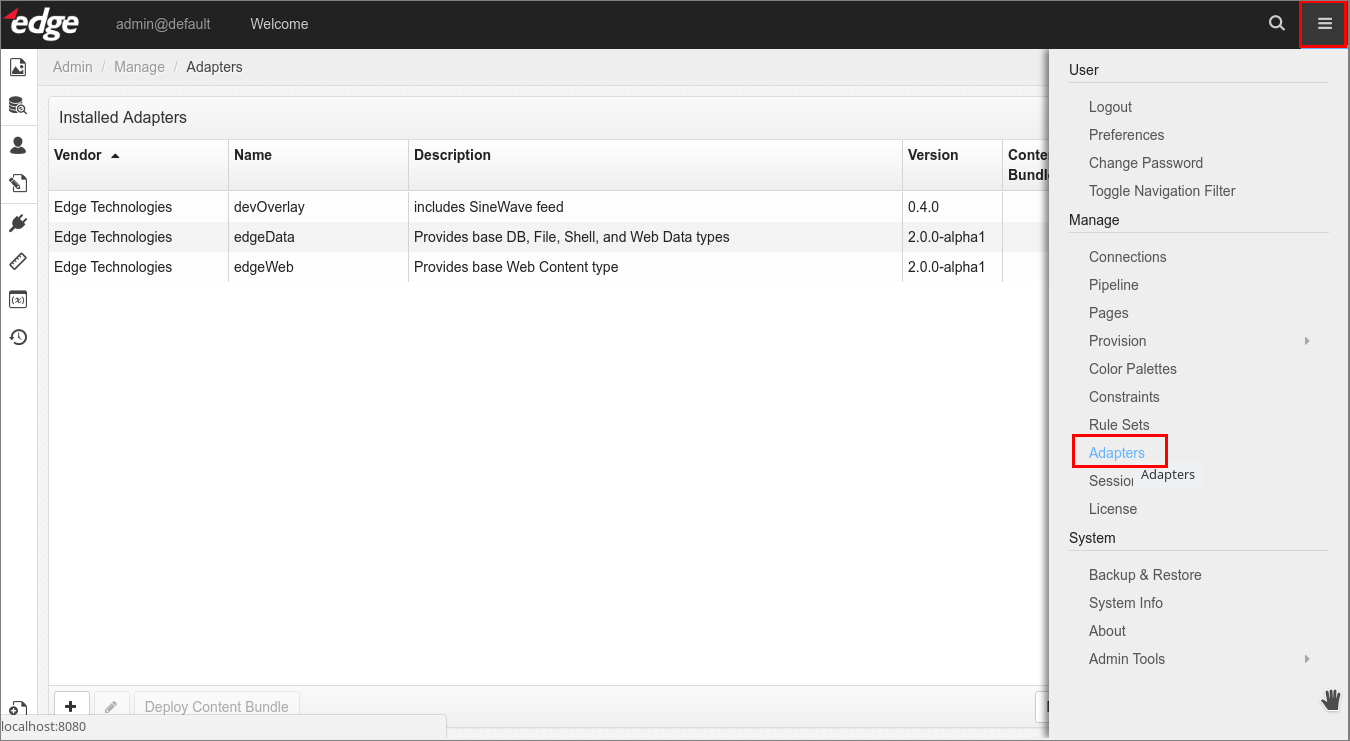
- Go to the system menu in the upper-right corner > Manage > Adapters (or Extensions if you are using the 4.3.0 version).
Adapters that have already been installed are displayed (if any). The Content Bundles column indicates whether an adapter includes any bundles.

- Select an adapter that contains content bundles.
- Click the Deploy Content Bundle button at the bottom left.
Note that this button is disabled until you select an adapter.
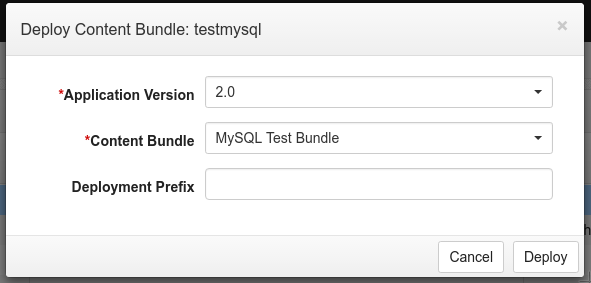
A dialog box is displayed.

- Select the version of the application from the drop-down.
This may further restrict the list of available content bundles to only those that apply. - Select the content bundle from the drop-down.
- (Optional) Enter a deployment prefix.
When content is added to the system, many elements may need unique names. If a collision is detected during deployment, it will fail and roll back the change. The deployment prefix is appended to places that require unique names and is especially useful if deploying the same content bundle multiple times. - Click Deploy.
Upon completion, there will be new connection(s), feeds, transforms, visualizations, pages, and menu items. Note that new connections will require configuration, and other configuration may also be needed for the new content to work correctly. Refer to the adapter documentation for more information.